Sweeten’s guide to Chicago remodeling costs in 2021, including kitchen, bath, and whole-home (plus outdoor budgets and permit tips!)
The budgeting step can be nerve-wracking for first-time Chicago renovators. You’ve finally moved on from daydreaming to starting a remodel of your home. Start by gathering some basic details: know what you can actually afford, and plan to add a small reserve on top of that. The materials you want to use also factor in, as well as how much work will be done. Plus, everything that isn’t visible—the infrastructure—will impact your costs. This can be a lot to keep track of, especially if this is your first time renovating. Fortunately, Sweeten has done some of the legwork in this guide to Chicago remodeling costs. This guide focuses on some of the major remodeling categories: whole house remodels, kitchen, bath, additions—as well as permits. You can use these details to create an accurate budget for a Chicago-area renovation. Sweeten matches home renovation projects with vetted general contractors, offering advice, support, and up to $50,000 in renovation financial protection—for free. Here’s a breakdown of typical starting costs (including labor and materials) gathered from Sweeten contractors and the 2021 Cost vs. Value Report:
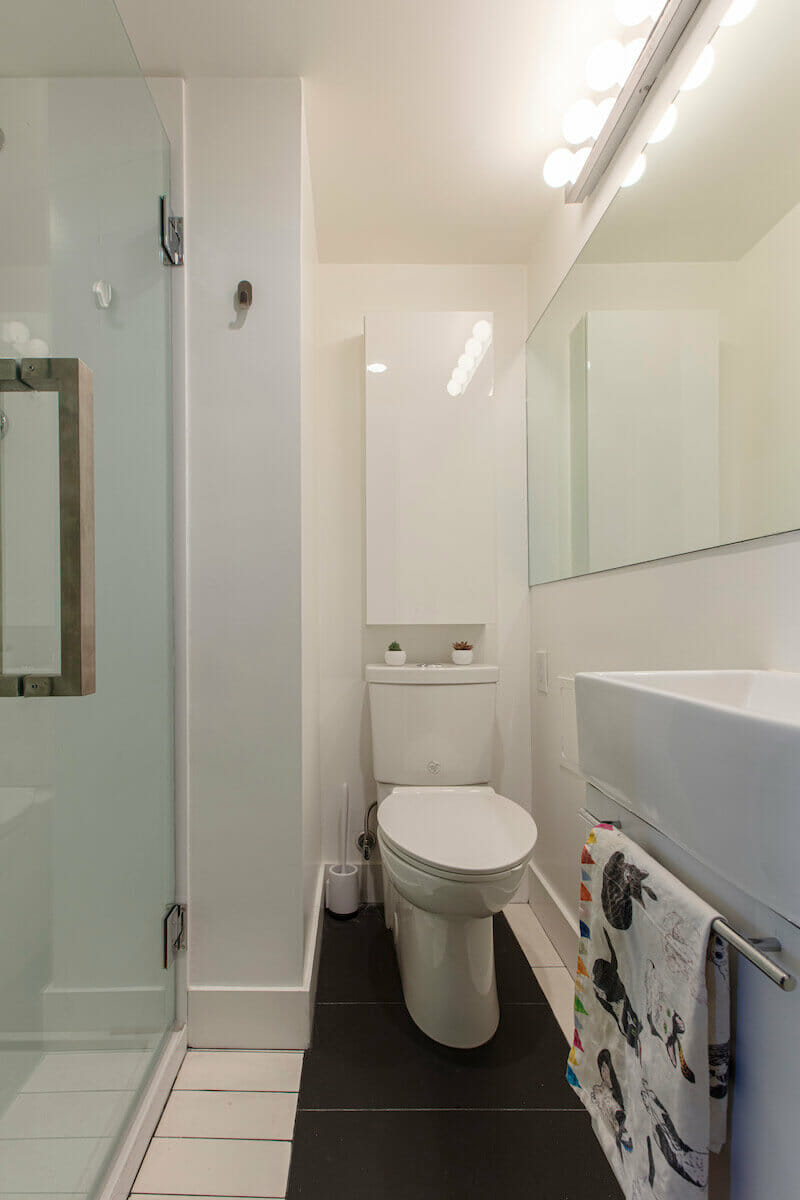
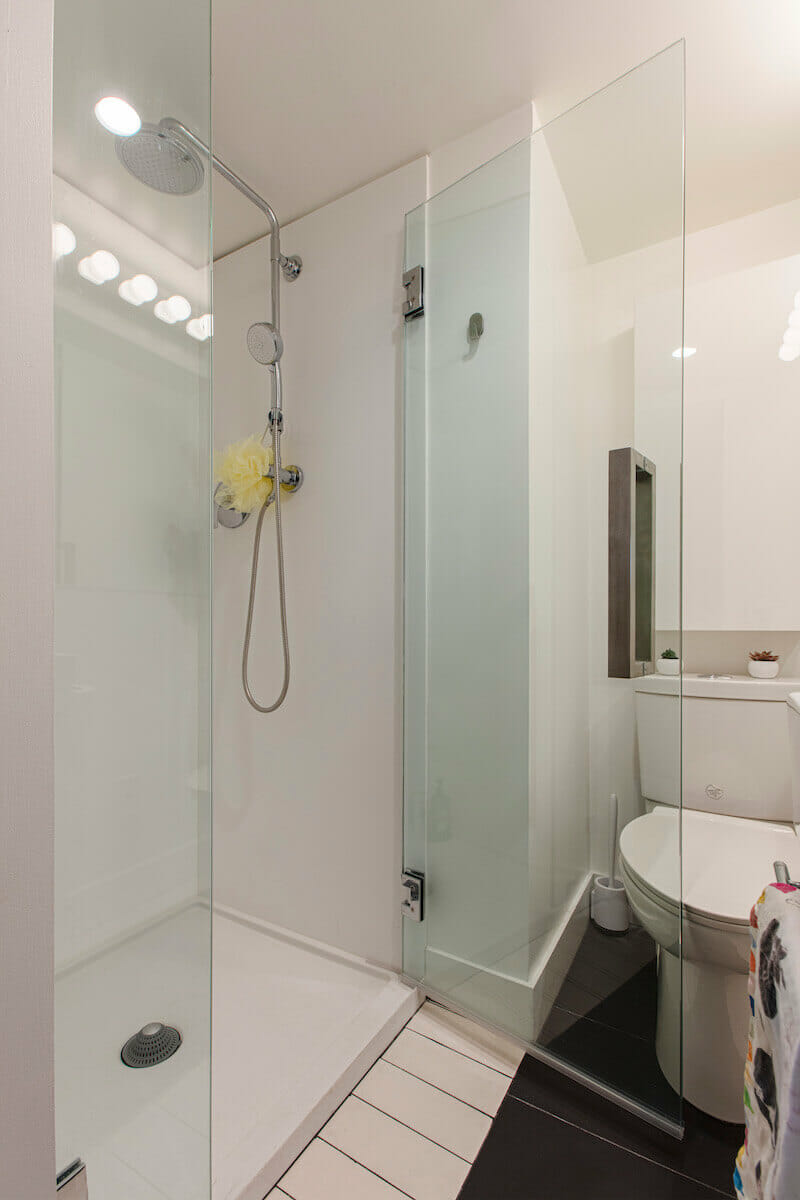
Keep in mind that every professional contractor will want to have a detailed conversation with you. They will also inspect your home before developing an estimate specific to your needs and wants. Pro tip: Do not wait. The pandemic has caused a backlog in the supply of materials in many sectors. For homeowners interested in renovating, it’s smart to schedule and sign with a contractor to lock in your material prices. You’ll also want to book a start date on the contractor’s schedule. If you do wait, prices will only continue to go up and your material order starts at the back of a long queue. Chicago remodeling costs per square footGut renovation vs. non-gut renovationGutting a home pretty much means starting from scratch. You’ll take everything down to the studs or framework, and/or you’ll knock down walls. Because it’s more intricate, a gut job starts at the higher end of the $100 to $200 psf range. By contrast, a remodel of the space within existing walls will be at the lower end. For example, remodeling a 700-square-foot, one-bedroom condo may range from $50,000 to $70,000, while a gut reno likely will exceed $100,000. This work usually involves running new plumbing pipes and wiring, moving doorways, and possibly installing new flooring. Costs for a full home gut renovation start at $100 per square foot. Take note: this scope of work is extensive! Expect demo, framing, insulation and drywall, wiring, plumbing, heating/cooling systems, millwork, paint, flooring, tile, light fixtures, electronics, and all finishes. (This excludes appliances, which can significantly increase costs, depending on how high-end they are.) According to Chicago-based Sweeten contractor Ryan, “A whole-house renovation—say, 3,000 square feet—would cost $200,000, at the low end, and start at $400,000 at the high end. It all depends on the materials chosen.” Wet rooms—connected to a water supply, such as bathrooms or kitchens—typically start at $250 psf. In the city, bathrooms in condos or co-ops can be as small as 30 square feet. However, in freestanding homes, they are typically larger than 5’ x 8’. High-end renovations that are fully custom with luxury materials can cost upwards of $700 per square foot. Architectural design and drawings, demolition, construction, materials, fixtures, lighting, and finishes are included in the fee. Contractors may build in overage fees to their estimates. This allows for the unexpected--which definitely can happen--to be covered. Overages are usually 10-15% of the project cost. (Sweeten recommends that the renovator reserve at least 10-15% above the bid as well). Don’t let the numbers shock you, though: the beauty of using a general contractor is that it’s one-stop shopping. Working with a contractor covers pretty much all the trades required for the job. This spares you the work of hiring individual tradesmen to complete the various aspects of your project. Chicago-based Sweeten contractor Brad recommends being realistic about how much you can spend. “You can’t buy a $100,000 ring on a $5,000 budget. Nail down your contractor first; they know pricing. And add 15 percent for unexpected conditions.” Average cost of a kitchen remodel in ChicagoBudget kitchen renovation costsA typical starting point is $22,000 based on a 100-square-foot kitchen. According to the 2021 Cost vs. Value Report, the average is $31,004 for 200 square feet. This translates to stock cabinets, hardware, and countertops, plus swapping outdated appliances with newer and more energy-efficient models. Mid-grade kitchen renovation costsSweeten has found that a 100-square-foot space at this finish level can start at $30,000. For a kitchen at 200 square feet, expect to pay an average of $81,820, according to the Cost vs. Value Report. This includes custom lighting, updating 30 linear feet of semi-custom wood cabinets, new countertops, a 3′ x 5′ island, double-tub stainless steel sink with single-lever faucet, garbage disposal, built-in dishwasher, energy-efficient range, vented hood, built-in microwave, dishwasher, and new flooring. High-end kitchen costsBased on what Sweeten has seen, expect starting costs to be $37,500 for a 100-square-foot room at this finish level. According to the Cost vs. Value Report, a kitchen at 200 square feet starts at $160,000. Expect top-flight custom cabinets with interior detailing like partitioned drawers, pullout shelves, pop up and down storage, stone, quartz, or porcelain countertops, stone or imported tile backsplash. Also included are custom lights, under-cabinet lighting, hardwood, stone or porcelain flooring, and typical high-end appliances. Sweeten contractor Ryan has seen kitchens cost $50,000 for a gut remodel, and at the high end, closer to $100,000. “Those figures,” he says, “can vary greatly, as some cabinetry alone might cost $80,000.” Average bathroom remodel costs in ChicagoBudget bathroom costsA starting point can be $15,000—$20,000 for a 35-square-foot-space with budget-friendly finishes from big box stores like Walmart, Home Depot, Menards, and Lowe’s. As this is a wet space, plumbing, electrical insulation, and exhausts, as well as correcting misaligned walls and floors will be part of the job. Mid-grade bathroomFor a 35-square-foot space, a remodel will start at $21,000. According to 2021 Cost vs. Value Report, $27,570 is the average cost for this type of project. This includes a recessed medicine cabinet, standard toilet, solid-surface vanity counter, and a porcelain tub. High-end bathroomThe typical cost at this finish level starts at $28,500 for 35-square-feet. The 2021 Cost vs. Value Report cites an average of $82,838 for a high-end renovation, based on a bathroom over 200 square feet. Features at this level include new ductwork, radiant heated floors, custom cabinetry, separate shower, freestanding tub, and custom lighting. Costs for a master suite additionMid-grade master suite addition costsEstimated costs are around $452 psf or $177,273 for a 24′ x 16′ space, including double vanity, freestanding tub, separate shower, walk-in closet, dressing area, according to 2021 Cost vs. Value Report. Whether it’s a ground-level addition, a basement remodel, or a second-floor addition, accessing rough-ins for plumbing will vary and affect pricing. High-end master suite addition costsFor a 32′ x 20′ master suite with a separate sitting area and large master bath over a crawl space, costs are around $553 psf or $359,232, according to 2021 Cost vs. Value Report. This kind of project includes custom shelving, built-in storage, as well as a walk-in closet and dressing area with windows. Basement renovation costs in ChicagoA starting budget for a basement is around $100 psf. At the low end, the cost averages $40,000 and includes a bathroom with a shower. Flooring options can vary significantly, including laminate, vinyl, engineered wood, porcelain tile, or stained concrete. At the high end, a project for $75,000 may include a 5′ x 8′-foot bathroom with a shower, a wet bar, and flooring in an overall space measuring 20′ x 30′. Costs for a basement renovation can be affected by multiple factors. Consider the existing condition of the space, if plumbing pipes need to be installed or moved, if new water service is required and if bracing needs to be done to eliminate structural supports in the middle of a space. Also take into consideration ceiling height, since Chicago basements are typically 8 feet or less, and as low as 6’7″. If you want to raise the ceiling, that requires digging out and underpinning the foundation. In addition, it’s necessary to assure the space is waterproof. A perimeter drain tile system is installed (repaired or extended). Connecting it to a sump pump also is important to consider, and this cost can start at around $2,500. Chicago remodeling costs for permitsThe permit process for renovating varies from Chicago to its suburbs, with each of the village’s or town’s governing bodies determining requirements and fees. In Chicago, permits are obtained through the Building Department. The issue in common is safety and compliance with building codes. In Winnetka, remodeling permits cost $30 per $1,000 of construction; new construction is $1.30 per square foot of new gross area. There also are permit fees for plumbing, electrical service ($9,800 for 200 amp service; $21,000 for 400 amp service), furnace, and AC as well as roofing and pools. In Hinsdale, the permit fee for remodeling is calculated on two percent of the value of construction. In addition, expect to pay permit fees for demolition ($3,000). In Chicago, applications for building permits must include architectural drawings and names of all licensed contractors—plumbers, electricians, HVAC contractors (usually supplied by the general contractor). There is no one size fits all. But expect to pay between $1,500 and $2,000 minimally for a whole house remodel, major kitchen, and/or bath. The larger the project, the more the fee, ranging to as high as $10,000. There’s also an Easy Permit Program for small projects that do not require architectural drawings (usually available the same day). There are nominal costs (a few hundred dollars for plumbing and electrical permits), which usually are pulled by those contractors. ©2021 Zonda Media, a Delaware corporation. Complete data from the 2021 Cost vs. Value Report can be downloaded free at www.costvsvalue.com. Find expert Chicago general contractors near youPost your project on Sweeten and we’ll match you with multiple vetted general contractors to provide estimates for your renovation, then help you evaluate the estimates. Sweeten also checks in with you until the project is completed. When you brainstorm with your general contractor to develop an accurate budget, you’ll be well on your way to enjoying the dream space you’ve always craved. -- Have a good handle on HOA (Homeowners Association) fees before you purchase your condo, co-op, or detached house. Sweeten handpicks the best general contractors to match each project’s location, budget, scope, and style. Follow the blog, Sweeten Stories, for renovation ideas and inspiration and when you’re ready to renovate, start your renovation on Sweeten. Via https://civilco.construction/chicago-remodeling-costs-kitchen-bath-whole-home/
0 Comments
More and more people love to use induction cooker, but sometimes they are accidentally spilling the soup or sauce on the cooker surface and fail to clean it immediately. After a period of time, there are dirt spots and burning spots, we may find it difficult to clean. We will teach you effective ways to clean the induction cooker and the maintenance of it.
Interior Design: Key Concept
Ways of Cleaning an Induction CookerWhen cooking with an induction cooker, it is recommended to simply clean it when there is residual temperature after each cooking to prevent food residues from staying on the glass surface and becoming a difficult-to-clean spot over time. If there is stubborn dirt on the stove, there is a chance that the bottom of the pot scratched the glass surface of the induction cooker, causing dirt to accumulate, or the food will stay between the pot and the induction cooker and caused scorching. The following methods can be used for cleaning: Use hot water and add white vinegar, soak the dirty area, and place a towel soaked in white vinegar on the dirty area for one hour. Allow the white vinegar to penetrate, prepare a scraper with a flat blade, and then scrape away the dirt. Keep the angle between the blade and the glass surface at about 30 degrees to remove most of the dirt.
In addition, there are some induction cookers cleaning detergents in the market, just like white vinegar, which also has the effect of softening stubborn dirt. You can also wait for a period of time to let it penetrate, then use a soft cloth or a specialized glass scraper to remove the dirt. Remember to pay attention to whether the cleaning detergents are suitable for your induction cooker and follow the instructions on the detergent to avoid any malpractice and result in damaging your induction cooker.
Interior Design: Lemonfridge Studio Precautions for Maintenance Work of Induction Cooker
5 Major Taboos When Using Induction CookerIf you want the induction cooker to have a longer lifespan, in addition to the above five maintenance precautions, there are five more taboos to pay attention to. The induction cooker is likely to be damaged if any one of the five taboos is committed.
The content and pictures of this article are provided and uploaded by the author. It does not represent the opinion of the company. If there are any copyright issues, please contact HKDecoman. HKDecoman, now going global as Deco-Man, is a Hong Kong-based renovation platform which provides professional consultancy services and pioneers in the development of A.I. homeowner-engineer matching. We aim at educating the public about the art of home renovation and have our eyes on transforming the traditional renovation industry, bringing standardisation, transparency, convenience and automation to the business.
Via https://civilco.construction/cleaning-tips-5-major-taboos-and-maintenance-methods-of-induction-cooker/ A couple aims to find a vetted contractor for their East Village kitchen renovation—finally
|
|||||||||||||||||||||||||||||||||||||||||||||||||||||||||||||||||


| Hougang Citrine | Kovan Wellspring | |
|---|---|---|
| Location | Along Hougang Ave 3, opposite Singapore Girls’ Home | Next to Kovan MRT station |
| No. of units | 749 | 586 |
| Unit types | 2-room flexi, 3-, 4- and 5-room | 2-room flexi, 3- and 4-room |
| No. of blocks | 6 | 4 |
| No. of floors | 12 to 13 storeys | 13 to 18 storeys |
| On-site and surrounding amenities | • Neighbourhood Centre: Hougang N1 Centre at Hougang Ave 1 (~10-min walk) • Hawker Centre/Wet Market: Hougang Hainanese Village Centre (~10-min walk) • Supermarkets: Prime Supermarket along Hougang Ave 1 (~12-min walk) and FairPrice Maple Tree 18 (~20-min walk) • Other eateries: 134 Lorong Ah Soo coffee shop (~10-min walk) |
• Integrated with Paya Lebar Kovan Community Centre • MRT stations: Kovan MRT on the North-East line (~2-min walk) and future Defu MRT on the Circle line (~18-min walk) • Shopping mall: Heartland Mall (~2-min walk) • Hawker Centre/Wet Market: Kovan 209 Market & Food Centre (~2-min walk) • Supermarkets: Cold Storage at Heartland Mall (~2-min walk) and FairPrice Finest at Hougang St 21 (~6-min walk) • Other eateries: Restaurants, cafes, fast food and supper spots at mixed-use development, Stars of Kovan and along Upper Serangoon Road (~4-min walk) |
| Schools within 1km (estimated) | Paya Lebar Methodists Girls’ (Primary) | Xinghua Primary School |
| Estimated completion date | First quarter of 2025 | Third quarter of 2026 |
| Pros & Cons of both BTOs | • Earlier completion date • Quieter surroundings • Lack of amenities • Stacks have less impact from traffic and car park • Car park located far away • Most areas surrounding the site not yet developed, so likely to face some construction down the road once living in |
• More surrounding amenities mean extra convenience, but it also means a noisier surrounding • Most stacks have a North-South orientation (breezier flats) • Better lift to unit ratio |
The sites
We can understand why Kovan Wellspring was so well received during the Aug 2021 sales exercise. The site, currently a car park, is sandwiched between Heartland Mall on one side and a wet market/food centre on the other. You also have Kovan MRT station right next to it. Within the site itself will be a revamped Paya Lebar Kovan Community Centre.

Site for Kovan Wellspring. Stars of Kovan (mixed-use development) to the left and the neighbourhood centre to the right.

Site for Kovan Wellspring. The site is also surrounded by a hawker centre, seen here at the far end of image.
Just opposite the BTO along Upper Serangoon Road is a line of eateries popular amongst foodies, with famed eats like Yaowarat Thai Kway Chap and Punggol Nasi Lemak. The mixed-use development across the road, Stars of Kovan, also contains a number of eateries. There’s no shortage of food options here.

Along the intersection between Upper Serangoon Road and Tampines Road.

Besides the hustle and bustle because of the amenities in this Kovan BTO, traffic was also pretty heavy along Tampines Road and Upper Serangoon Road. The former is more of a concern, since there are stacks at Kovan Wellspring that are facing Tampines Road directly. This arterial road also leads into expressway, KPE, so traffic will likely be always busy.

Along arterial road, Tampines Road.
There is less fanfare over at Hougang Citrine as it has fewer amenities around the site. It sits at the edge of an industrial district and several depots. One of the newest additions near the site include a stack-up complex, Defu Industrial Park. This industrial park is set to collate a few of the existing industries around the site under one building and will house a workers’ dormitory as well as a Defu City Centre (~18-min walk) that will provide a range of amenities including F&B options, convenience stores, medical clinics and childcare centres.


Site for Hougang Citrine. Much of the area is still relatively undeveloped.
The downside to being near this new industrial city is that traffic along Hougang Ave 3 will likely pick up significantly once the industries move into the industrial complex. So there might be an increase in heavy vehicles moving about and around the area.

Along Hougang Ave 3
Currently, the main amenities are located at the neighbourhood centre along Hougang Ave 1, approximately a 10-min walk away. There is a Prime supermarket there, a food centre and wet market as well as a couple of coffee shops. The area’s amenities are likely to be boosted by the upcoming Hougang BTOs in this area (set to launch in Nov 2021).
Both BTOs sit relatively near Paya Lebar Air Base, which is set to relocate only from 2030 onwards, so aviation noise is still going to be an issue for a few years down the road if you move in by 2025 or 2026.

Site Map for Kovan Wellspring.

Site Map for Hougang Citrine
Looking at the amenities for both sites, Kovan Wellspring is undoubtedly the winner. Most of the stacks there also have a North-South orientation, which will translate to breezier units. But being surrounded by all these amenities and having a community centre on site will mean foot, vehicular traffic and noise levels around the area will be significantly higher. The car park for the community centre is located on the site as well.
For Hougang Citrine, its car park is located quite a distance away from some of the blocks. The good thing about this is that there is less noise and traffic impact from being near the car park, but the drawback is that drivers will have to walk quite a distance just to collect their vehicles.

4-room unit comparisons: Hougang Citrine versus Kovan Wellspring
Save for the 4-room units, there aren’t major differences for the rest of the unit types for both BTOs. Do note that only Hougang Citrine has 5-room units available. If you are opting for a 4-room flat, here’s a look at the two layouts available at Hougang Citrine and Kovan Wellspring:

Here’s a comparison of the 4-room layouts:
| Hougang Citrine | Kovan Wellspring |
|---|---|
| • Larger layout at 95 sqm • Dedicated foyer area • Likely to have a galley kitchen layout to maximise counter space • Weird column in the middle of the flat • Each window panel is slightly separated from the next one • Might have an awkward wardrobe layout in the master bedroom • Able to hack the internal walls of all three bedrooms • Window for common bathroom looks out into service yard |
• Smaller layout at 93 sqm • Possibility of a larger living room, by knocking down adjacent bedroom wall • More conventional BTO layout • Spacious master bathroom • Long stretch of windows • Structural wall between two common bedrooms i.e. cannot hack to enlarge area |
Which unit to go for at Hougang Citrine?
2-room flats

The 2-room units are located at blocks 178A, 178B and 179A. Type 2s are bigger, giving you the option of an extra bedroom that can contain a single-sized bed.
If you want a quieter stack, choose one that isn’t facing the areas where people tend to gather like the playgrounds and fitness corners. Do avoid stacks that are facing the main road and the site reserved for school. The site map indicates that all the main roads surrounding Hougang Citrine will have bus stops. Because buses run on a regular frequency, it can get quite noisy if you go with a road-facing stack. These are the stacks to pick for peace and quiet: 108, 110, 112, 186 and 188.
For privacy, you’ll want to for a corner unit, away from the lifts and rubbish chutes and preferably one that is standalone without being attached to an adjacent unit. These are the best 2-room stacks for privacy: 116 and 134.
Some of the stacks aren’t blocked by another stack in front of it, which can mean a breezier interior if you open the doors and windows to your unit. These stacks are likely to be relatively windy: 104, 144, 172.
3-room flats

For 3-room flats, you can choose from stacks 106, 148, 156, 176, 182, 202, 206 and 230.
You’ll have to choose between the stacks facing the pavilion (156, 230), the fitness corners/playgrounds (106, 146, 202, 206) and stacks facing the future school site (182, 176). Take note that stack 182 also faces an upcoming bus stop.
For privacy, stack 182 is your best choice seeing as it’s a corner unit. Do note that it isn’t a standalone stack though.
Based on the sun directions in Singapore (northwest and southwest depending on the time of the year), most stacks here are likely to get the afternoon sun. However, you’ll also want to check if there are neighbouring buildings that can provide some shade (the 3D model of the unit at HDB Hub will help). Stack 156 might be able to receive a little bit of shade from the sun coming in the southwest direction because of the neighbouring stack.
4-room flats

For 4-room units, you get to choose from stacks 100, 102, 148, 150, 154, 158, 160, 164, 166, 170, 198, 200, 204, 208, 214, 220, 222, 224, 226 and 228.
Stacks 208 and 222 are the best for privacy because they are corner units, away from the lifts and rubbish chutes and they don’t have an adjoining adjacent stack.
In terms of the afternoon sun, stacks 220, 222 and 228 might get some shade from the neighbouring stacks so they are likely to be relatively cool when you come home in the evenings.
For a quieter stack, consider stack 208 since it is somewhat further away from the playground. The rest of the 4-room stacks are either facing the future school, in close proximity with the playgrounds, pavilion and fitness corners, or are facing the main roads.
5-room flats

5-room buyers, you’ll have your pick from three blocks at stacks 152, 162, 168, 196, 210, 212, 216, 218 and 232.
In terms of privacy, stacks 152, 162, 210 and 216 are good options. For stacks 152, 210 and 216 though, it’s likely that the service yard can be seen from the common corridors.
Stacks likely to be shaded from the afternoon sun from neighbouring blocks include stacks 196 and 212.
For peace and quiet, you can consider a unit on a higher floor for stack 218. It faces the 5-storey car park, but you can avoid fumes and traffic noise if you get a unit on a higher floor upwards of fifth floor. Other 5-room stacks are either facing the future school, near the main roads or are facing the pavilion and drop-off points.

Which unit to go for at Kovan Wellspring?
2-room flats

Pick from the following stacks for 2-room flats: 108, 110, 112, 114, 116, 118, 120, 122, 146, 148, 150, 152, 158, 160, 166, 168, 176 and 178.
We wouldn’t recommend going for a stack (146, 148, 150, 152, 176 or 178) that faces Tampines Road. Not only will traffic noise be an issue seeing as Tampines Road is such a busy one, the dust and fumes from on-going traffic will also be a problem.
For 2-room units, 158 and 160 are pretty decent choices if you don’t want a stack that is too noisy. They are away from the main road, away from the hustle and bustle of the neighbourhood centre, and don’t face any playgrounds or fitness corners where noise levels are high as people tend to congregate at those zones.
For stacks that are likely to get some shade from the afternoon sun, look to these ones: stacks 120, 122, 158 and 160.
In terms of privacy, go with stacks 116 and 152. These are corner units that don’t have an adjoining unit next to them.
3-room flats

Pick from the following stacks if you are going for 3-room units: 136, 154, 156, 170, 172 and 174.
You will have to choose from a stack that is near the Paya Lebar Kovan Community Centre (136), stacks that are facing the main road (172 and 174) or stacks that are overlooking the playground and fitness corners (154, 156 and 170).
Units on the 4th floor and below at stack 136 might get some shade from the afternoon sun thanks to the adjacent CC. The rest of the 3-room stacks are likely going to receive some afternoon sun.
For privacy, we would recommend 136 and 170, which are standalone stacks and corner units.
4-room flats

These are the 4-room stacks to choose from: 100, 102, 104, 106, 124, 126, 128, 130, 132, 134, 138, 140, 142, 144, 162, and 164.
For privacy, go for stacks 102, 104, 126, 128, 134 140, 142 and 164. While they aren’t standalone stacks, they are corner units with some privacy.
Look out for stacks 124, 126 and 138 if you want a quieter home. These stacks are inward looking, so they don’t face Tampines Road or the neighbourhood centre. They are also not located next to the CC or directly facing the playground.
You might get some respite from the afternoon sun if your unit is located on the 4th floor or lower at stacks 132, 134, 138 and 140.
Still have questions on either Kovan Wellspring or Hougang Citrine? Let us know in the comments or through our socials!

Via https://civilco.construction/kovan-wellspring-and-hougang-citrine/
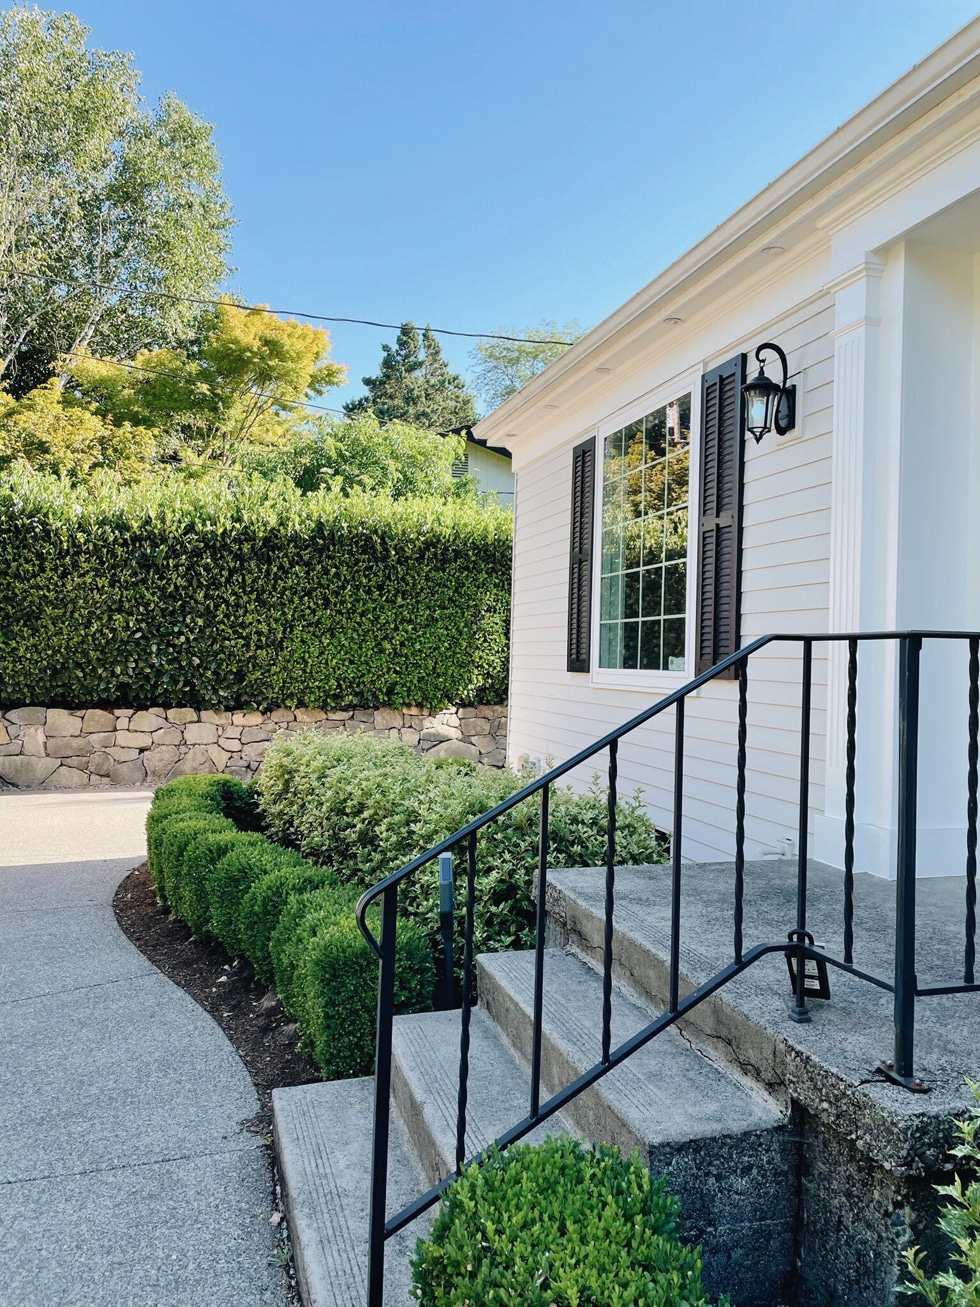
Hello! It’s Kylee here to show you some more of our new home! Just a few weeks ago we moved into our new Cape Cod style home (or just a cape depending on where you live!). To be honest I still can’t believe it’s really ours! While we owned our townhouse for years, this still feels kind of like my first real home. No shared walls, a yard to take care of, more rooms than I know what to do with…am I a real adult now? How do I pick a lawnmower? When does one prune the bushes? So much to learn. 
I shared a few peeks of our new home here, but today I wanted to give you more of a full empty tour!
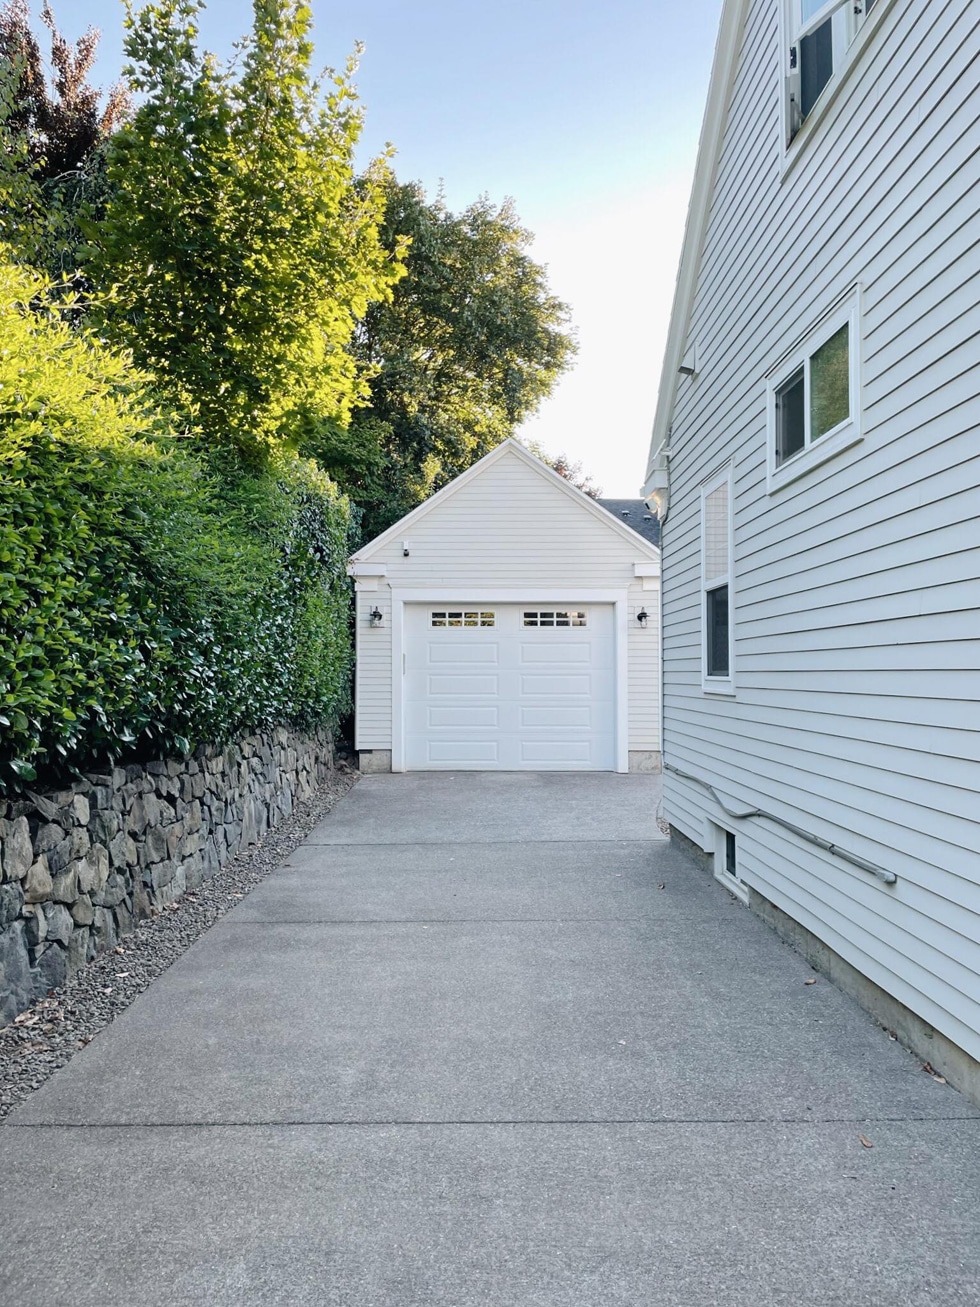
I’ve always loved the look of a long driveway that leads to a set back detached garage, so that’s one of the features we loved about the home!
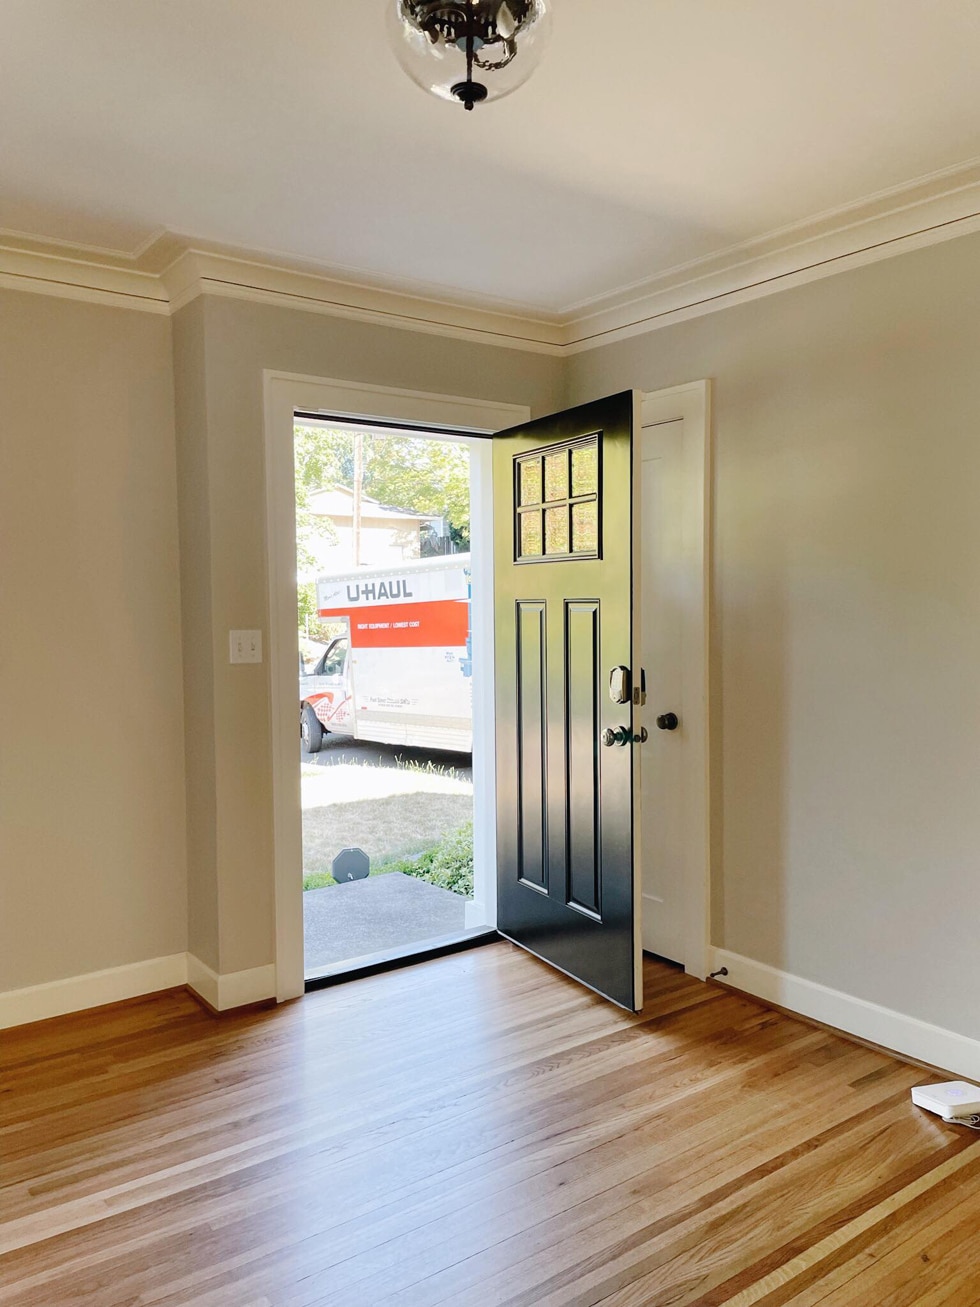
You enter the house directly into the living room, so one design challenge I am working on right away is creating a welcoming, entry that will *feel* like its own dedicated space.
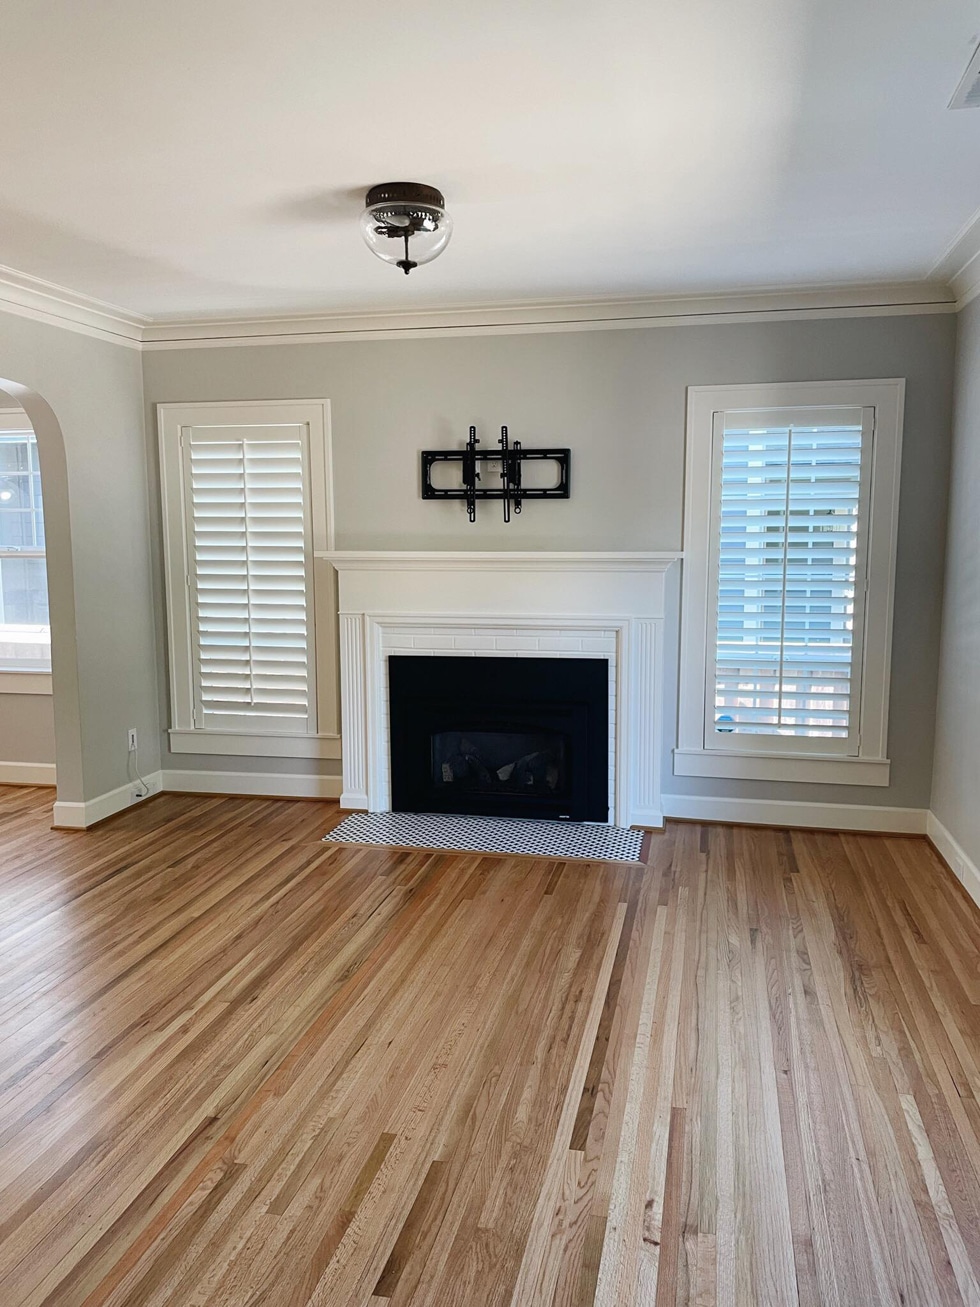
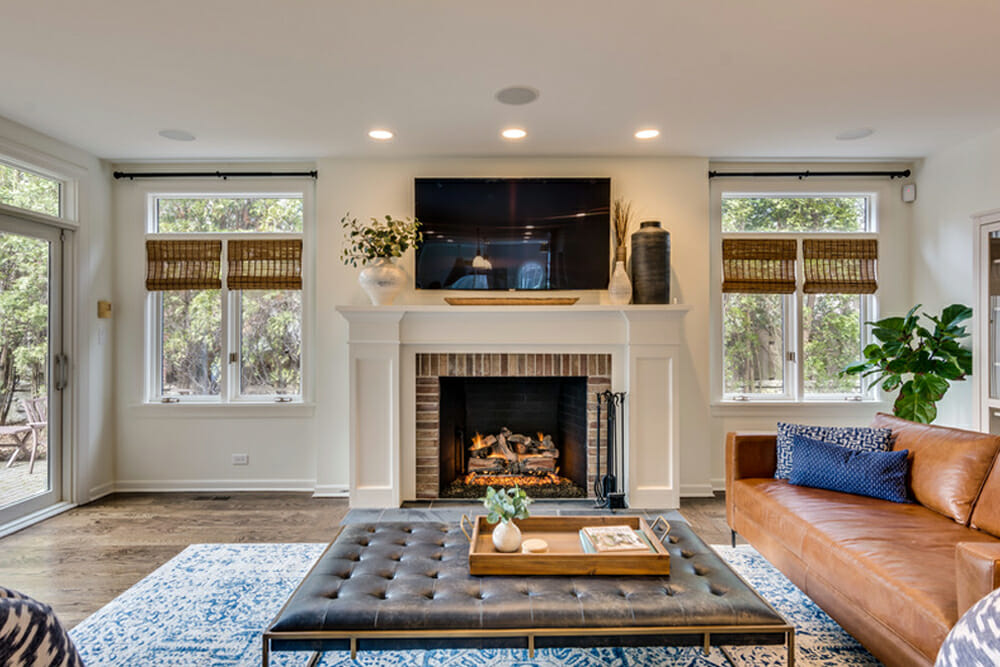
I can’t wait until it gets chilly enough to use the gas fireplace! We loved having one in our previous home and are looking forward to having one again.
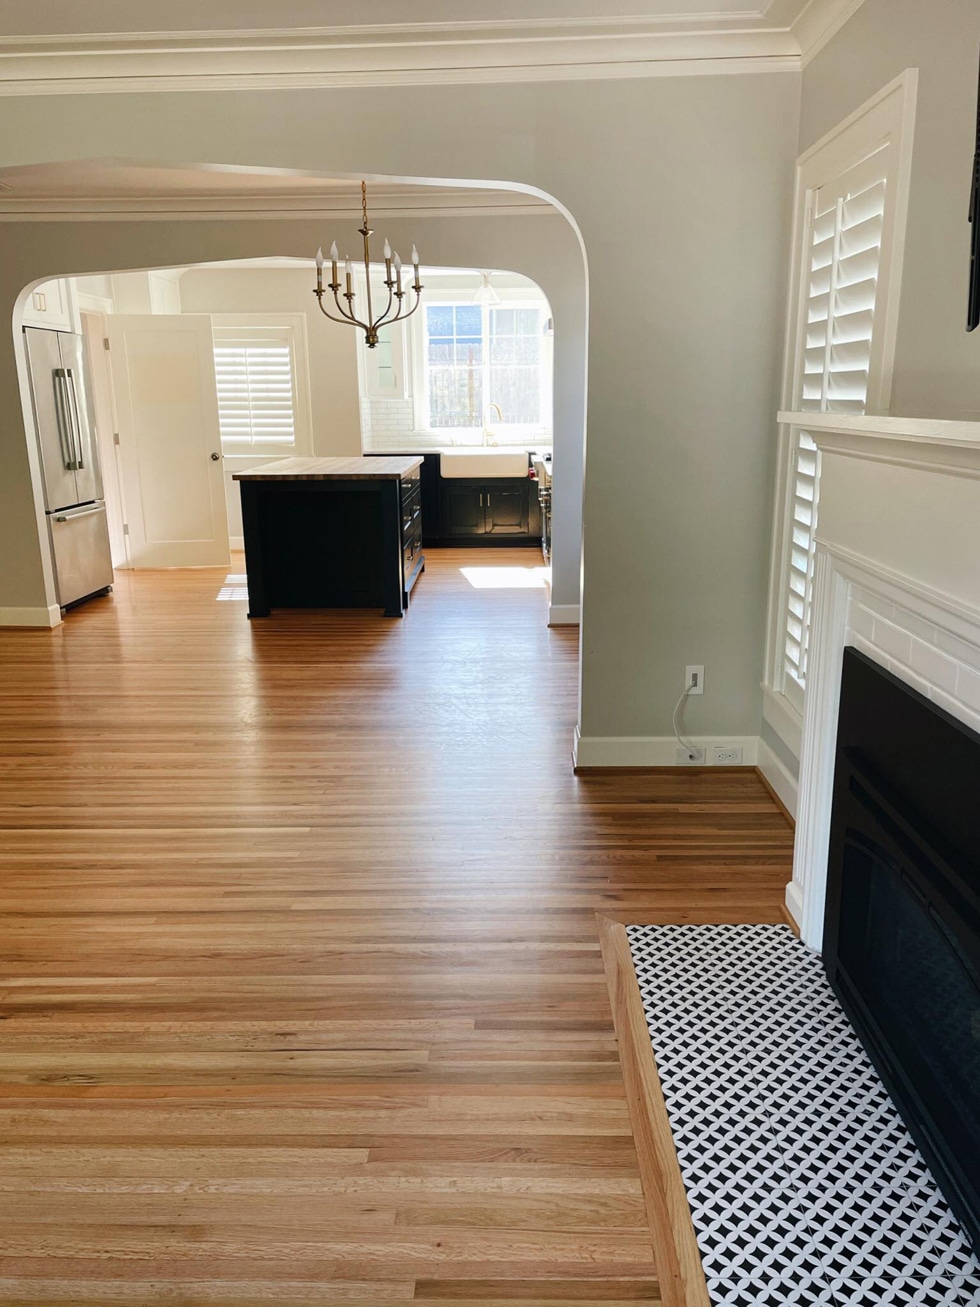
From the living room you can see into the dining room and kitchen, After years of eating around a kitchen island, it looks like we actually need to get a dining table now! The double arches make my heart flutter and I just love how this space is open, but still feels like individual rooms. While we looked at houses that were all different styles in terms of how open they were, there is something about homes with more unique floor plans and lots of rooms that feel so cozy and homey to me.
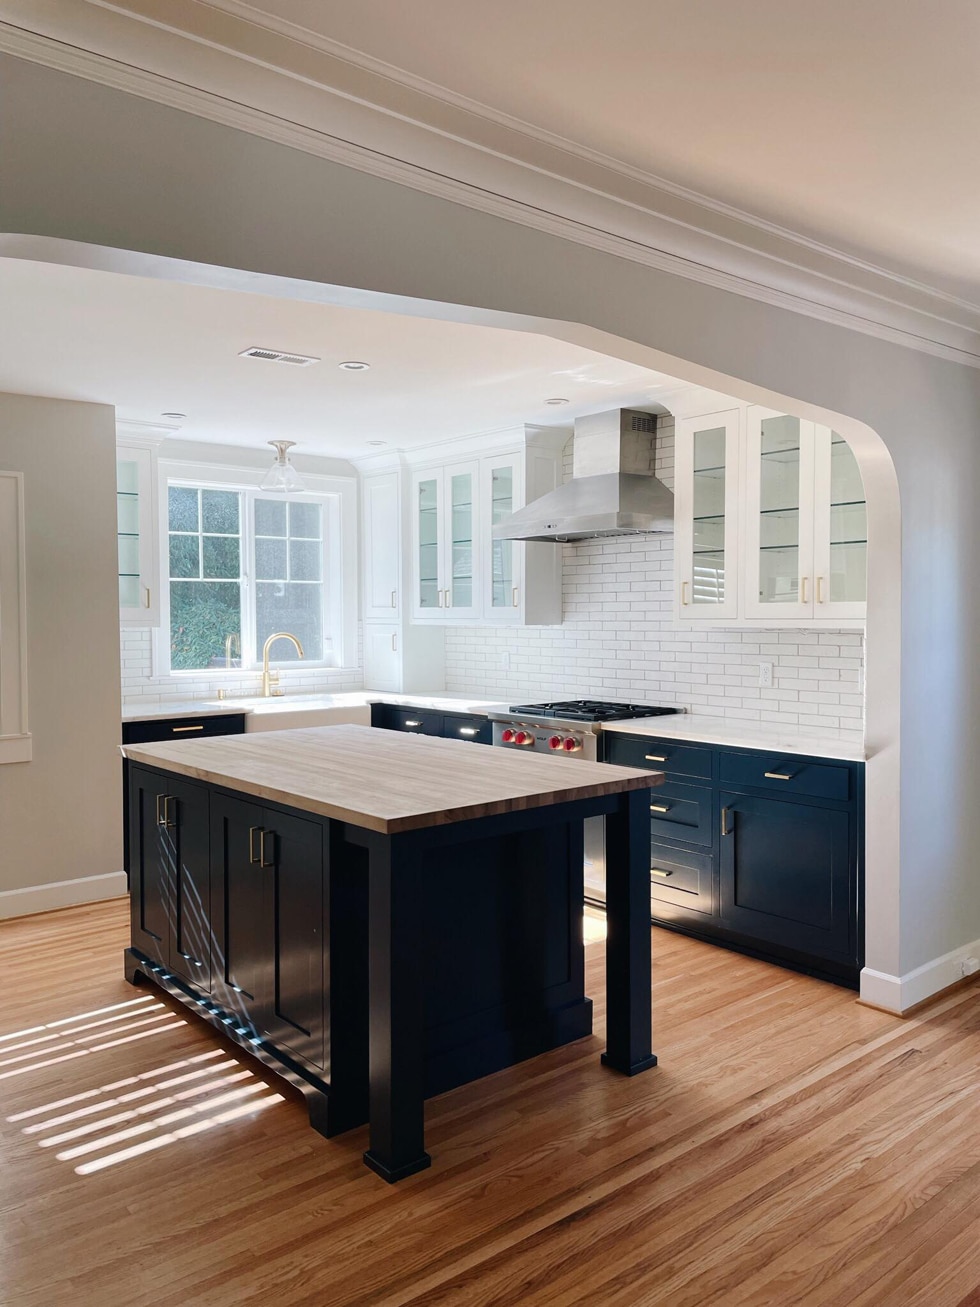
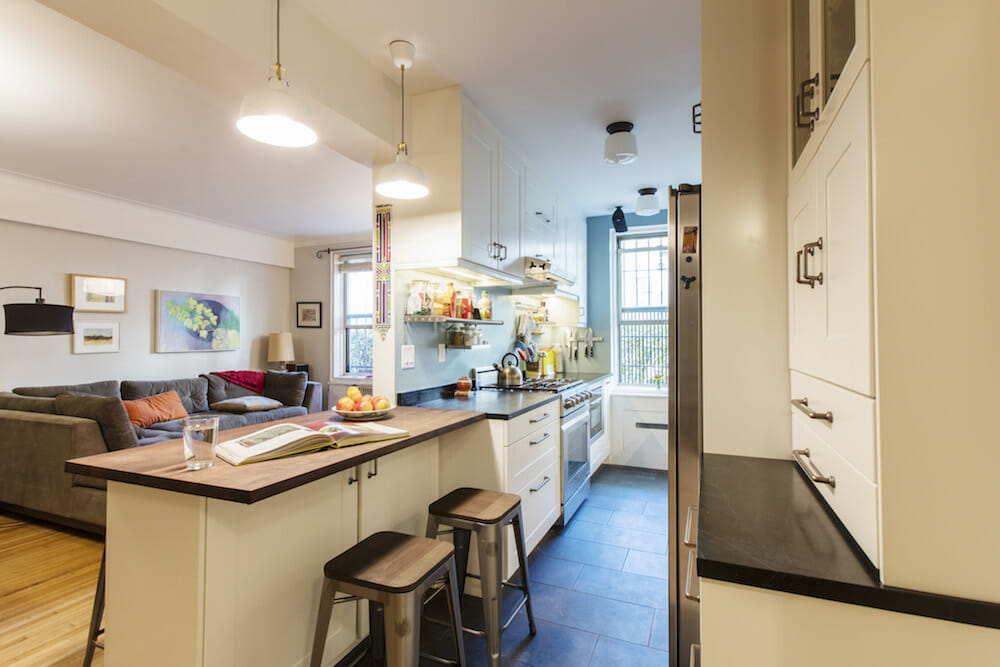
I’m still a bit shocked that we ended up with a such a beautifully remodeled kitchen. We saw lots of homes in our house search and even the remodeled ones usually had quite a few features I wouldn’t have chosen, but this house has so many things I would have picked for myself! The housing market was brutal and after months of searching and losing homes (I shared more about that in this post) it was looking like we were going to have to lower our expectations and started to accept that a remodel may be in our future.

But, we got so lucky with this house! We’d noticed it when it was first listed, but it went pending right away (of course!). Then a few weeks later we happened to be visiting Portland and saw that the sale had fallen through and it was back on the market! So, we walked into an open house and fell in love and hoped that due to the circumstances, we might actually have a chance. And we did have a chance! We weren’t the only offer, but we were able to get ours accepted!
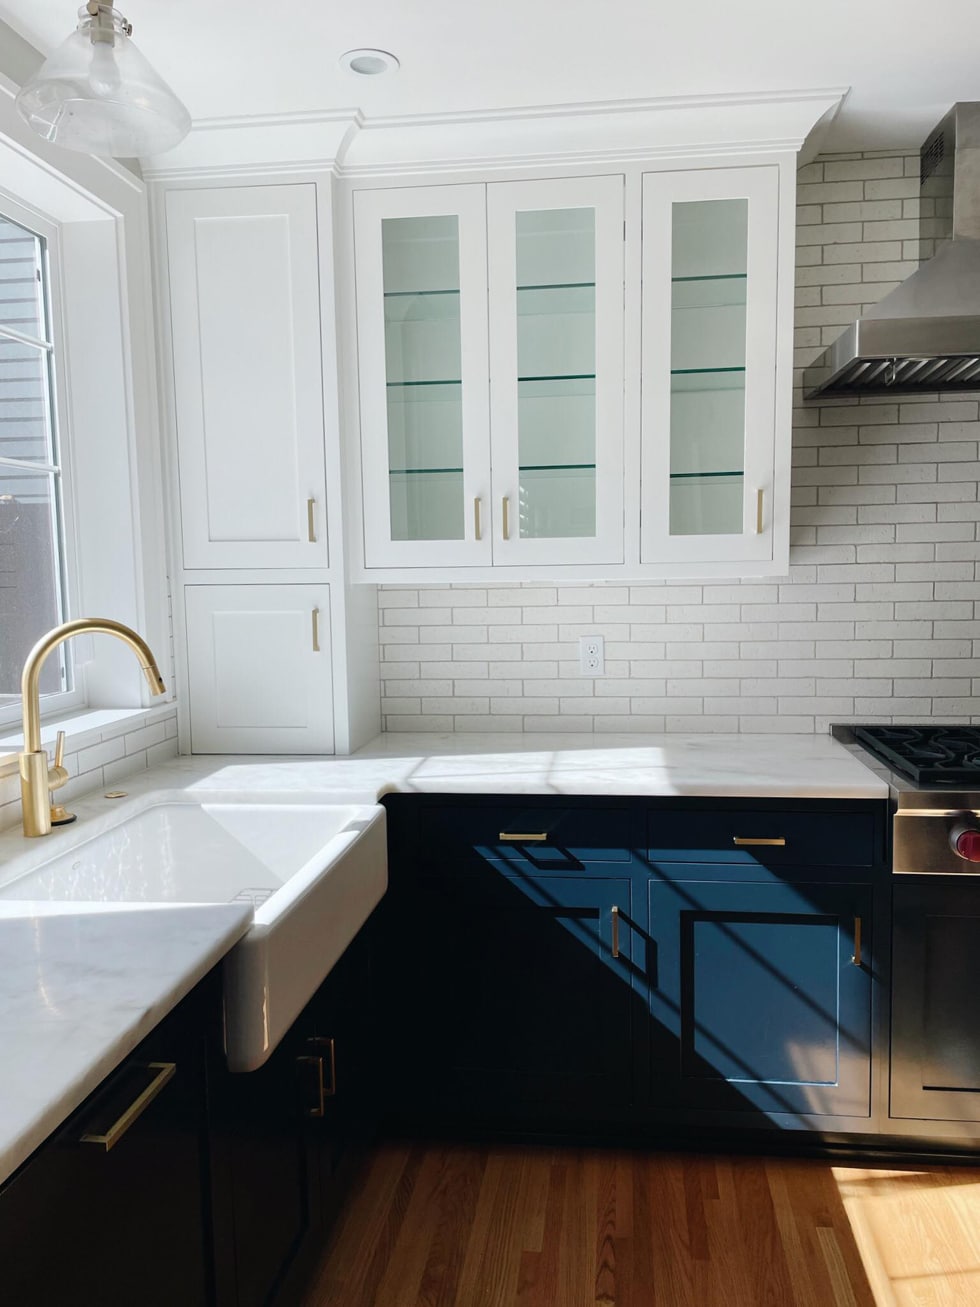
Overall, I love everything about the kitchen–the marble counters, the butcher block island, the paint colors, the light that streams in…I spend a lot of time cooking in here and it’s been bringing me so much joy! I may change the light above the sink and maybe eventually add some pendant lights over the island, but for now it’s perfect. Oh and in case you missed it, I already wrote a blog post about how I filled those glass front cabinets! You can read that post here (I also shared some of the kitchen sources in that post like our cabinet paint color).
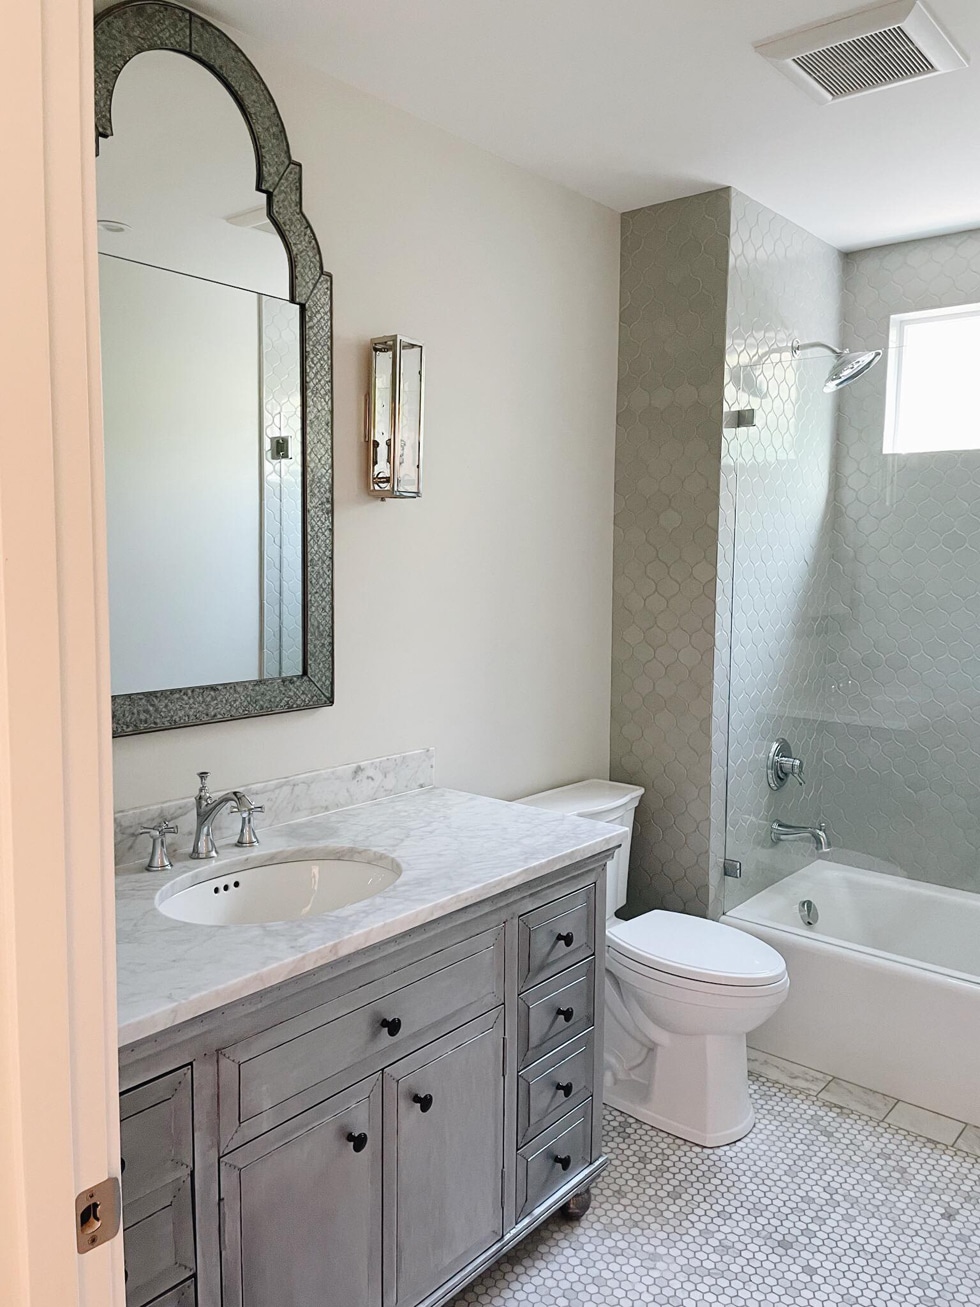
The house has three bathrooms and every single one of them was done so nicely! This one might be my favorite in the house because of all the gorgeous tile! This is the bathroom on the main floor between two bedrooms. I will spare you photos of the bedrooms, because they’re really just two boxes. We will be using one for a home office and one as a guest room! I’ll share those when they’re looking cute.
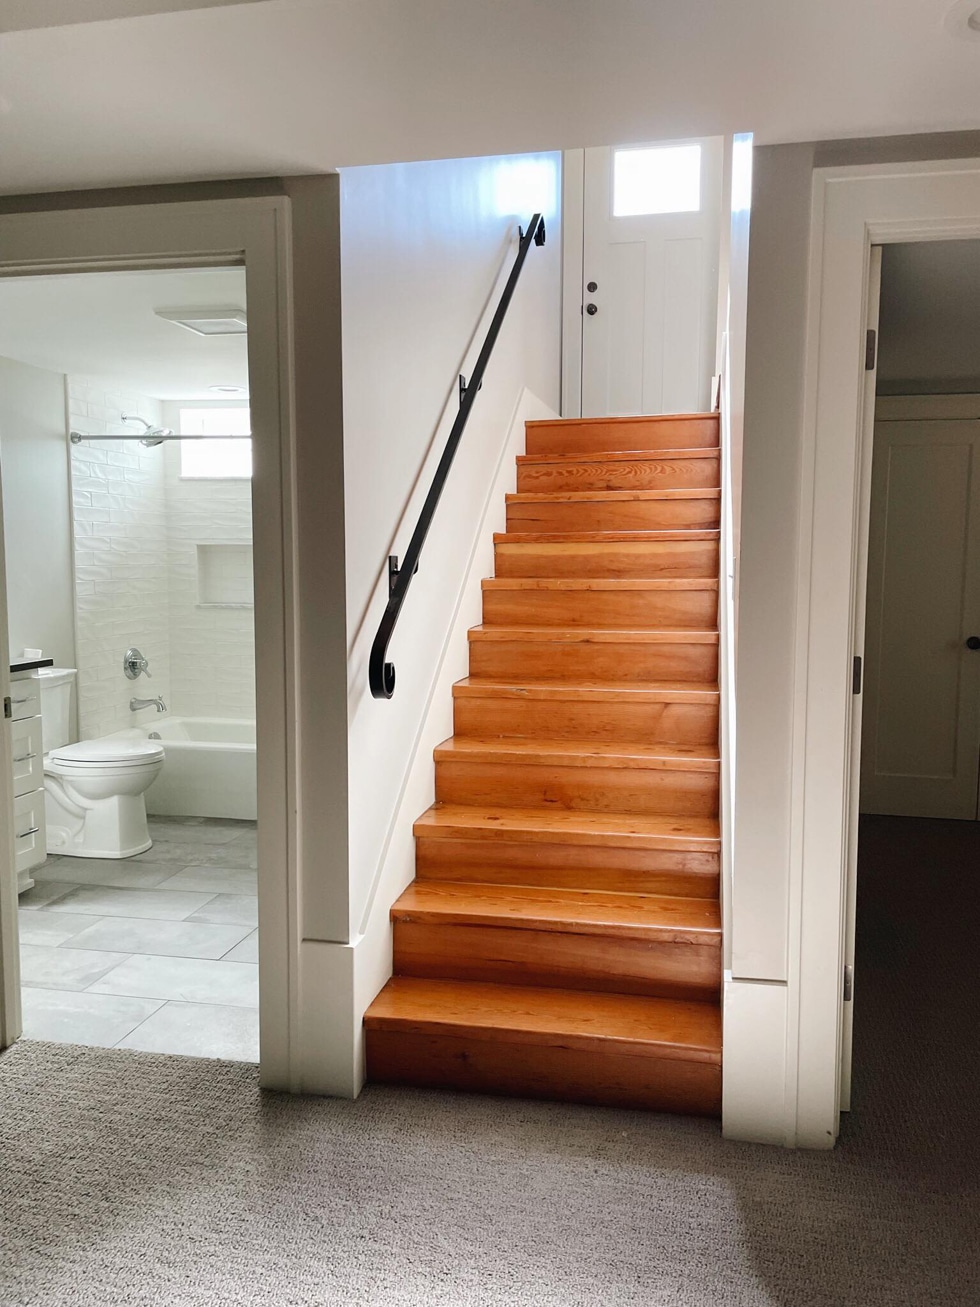
Then downstairs we have a finished basement. Pictured above is the staircase down and a bathroom on the left (even the basement bathroom was done nicely!) and another bedroom to the right.
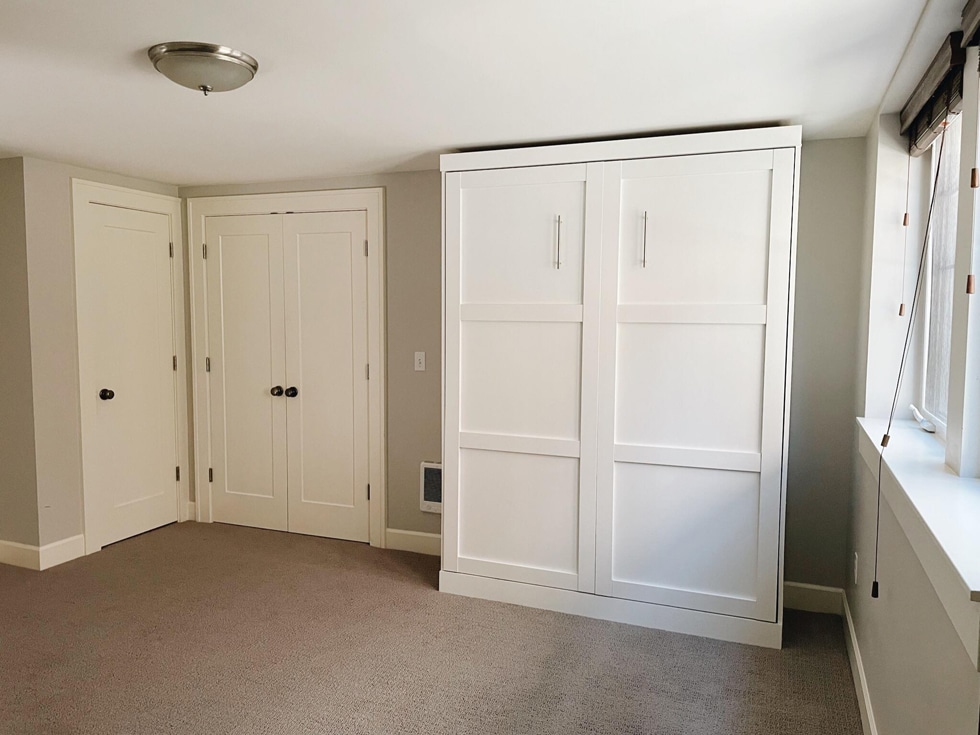
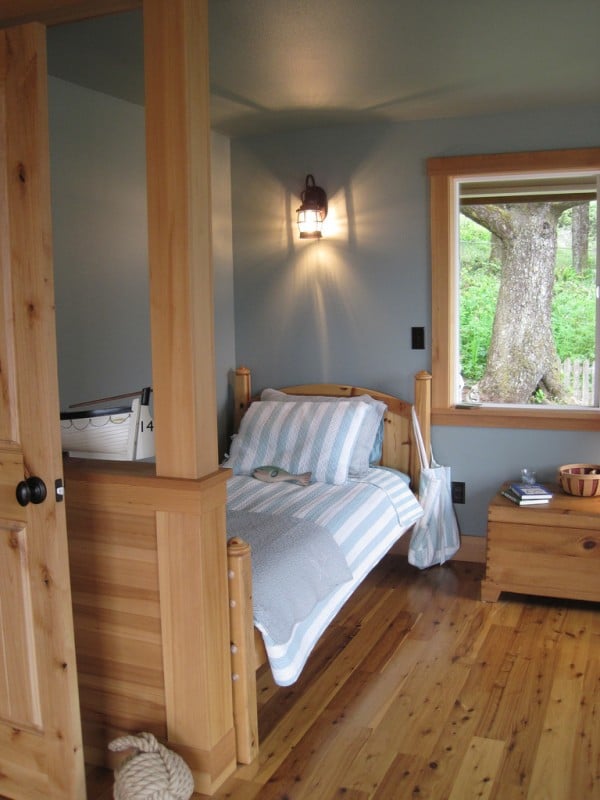
The basement bedroom came with this pull down murphy bed and will be another great guest space for us! I imagine our upstairs guest room will be for short term guests and this will be for someone staying longer or who comes with kids or dogs (hi Mom and Dad and Jack and Lily!).
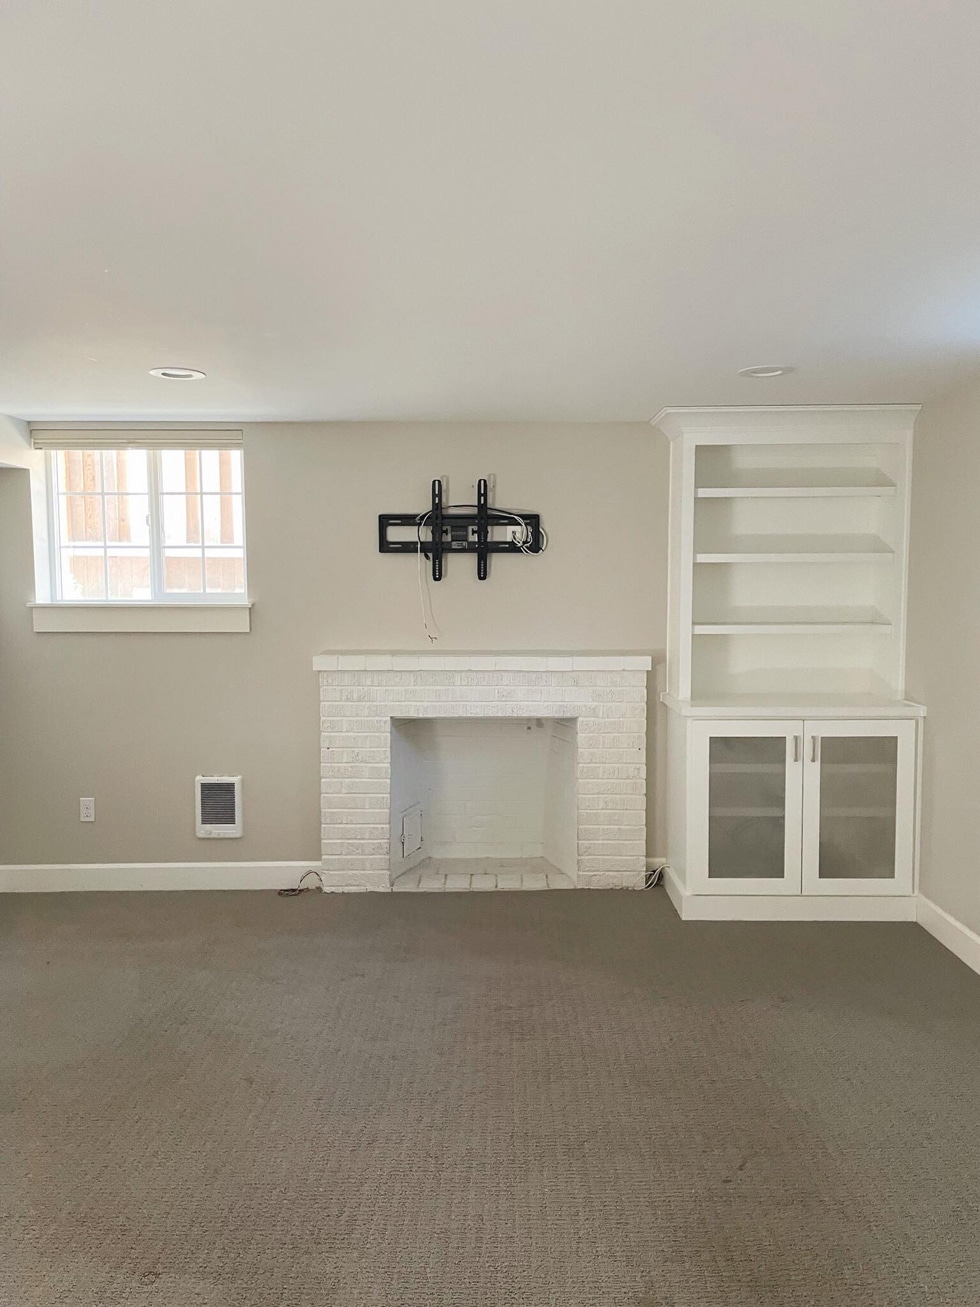
Then there is this big, open space with a fireplace and a space for a TV. This space isn’t on our priority list, but eventually we would like new floors and paint down here. Maybe a big cozy sectional for movie nights?
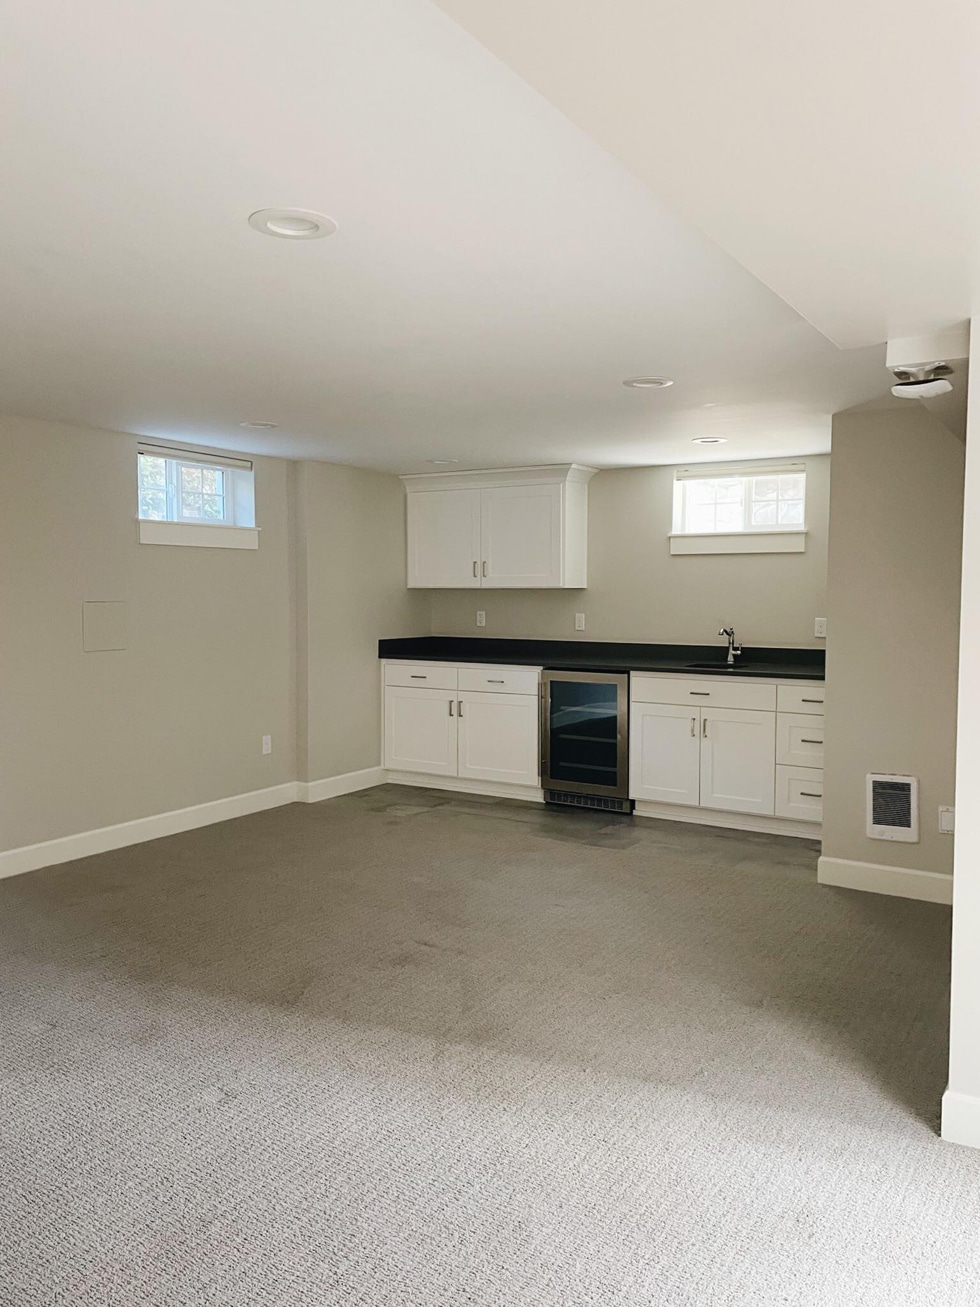
And on the other side of the open space is a wet bar/mini kitchen. We aren’t entirely sure how we are going to use this space yet so TBD.
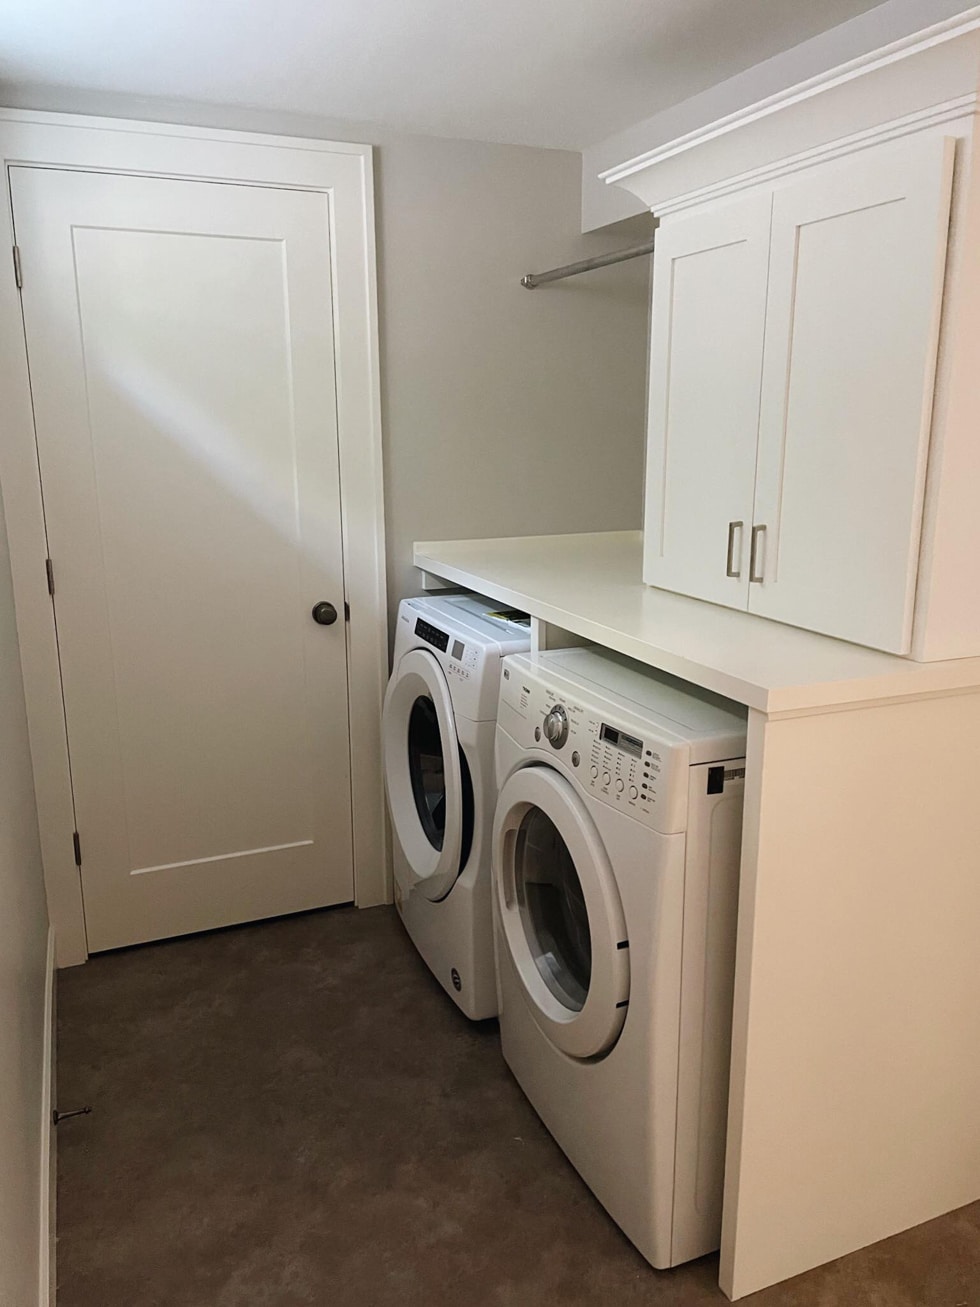
A whole laundry ROOM! In my townhouse I just had a laundry closet so this feels like a luxury. I’m thinking wallpaper may be just what’s needed to spark a little joy into this space.

Now for the final space, the primary suite, which is basically the whole upstairs/converted attic.
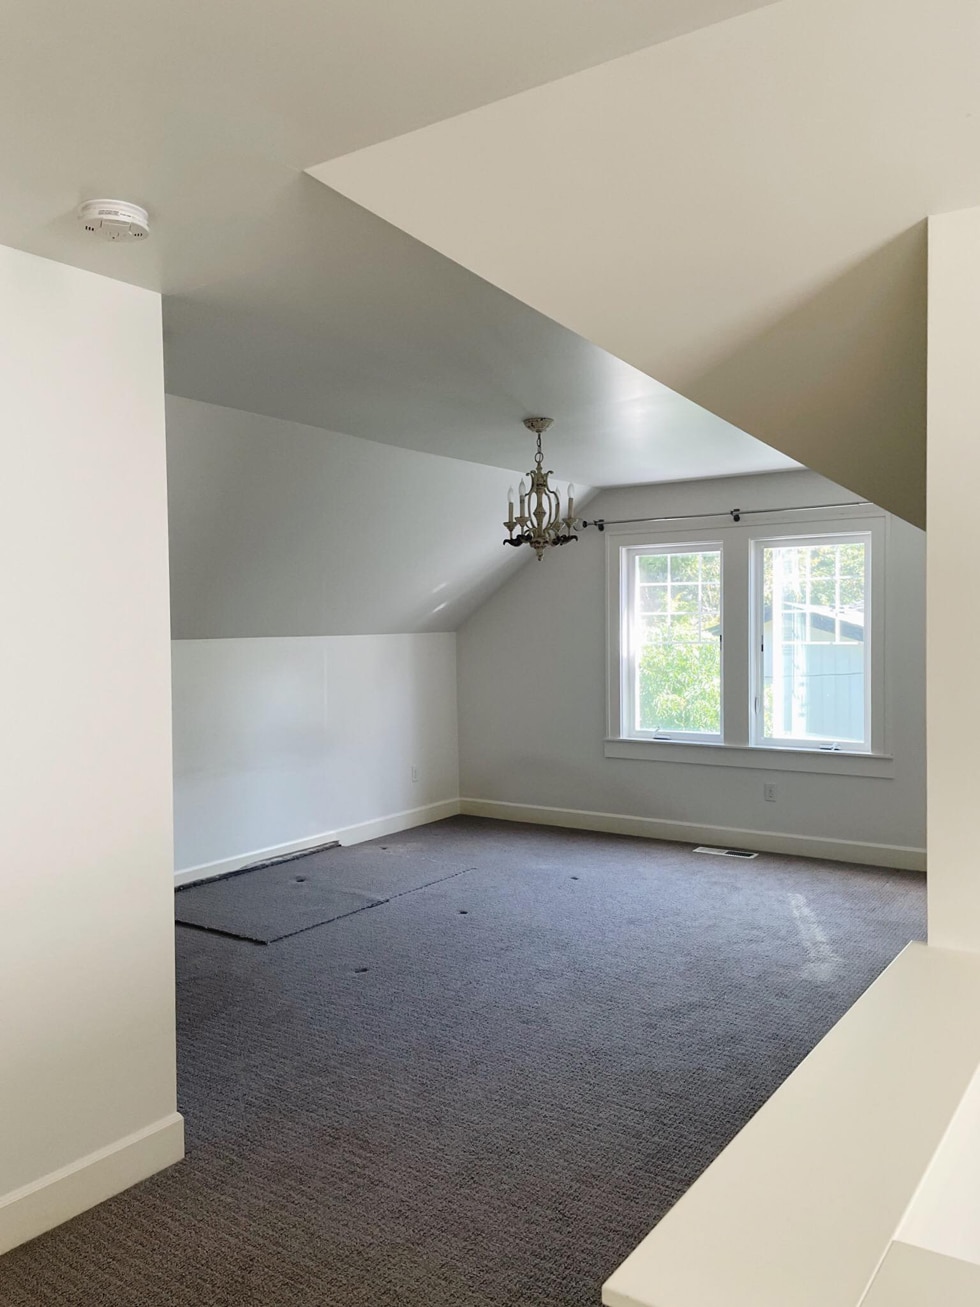
We have plans to get new hardwood floors up here soon. As anyone doing house projects right now knows, there are lots of delays on supplies, but hopefully this will be done in the next few weeks!
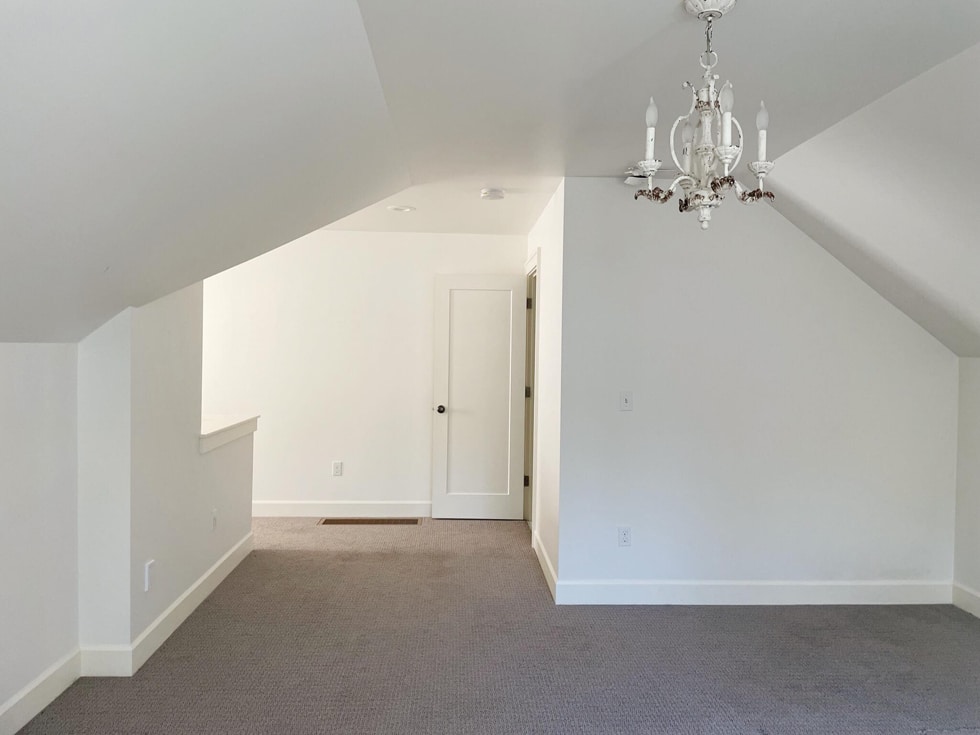
I’m still debating on paint colors, but we may actually transform this space with something darker to be a bit more moody and cozy.
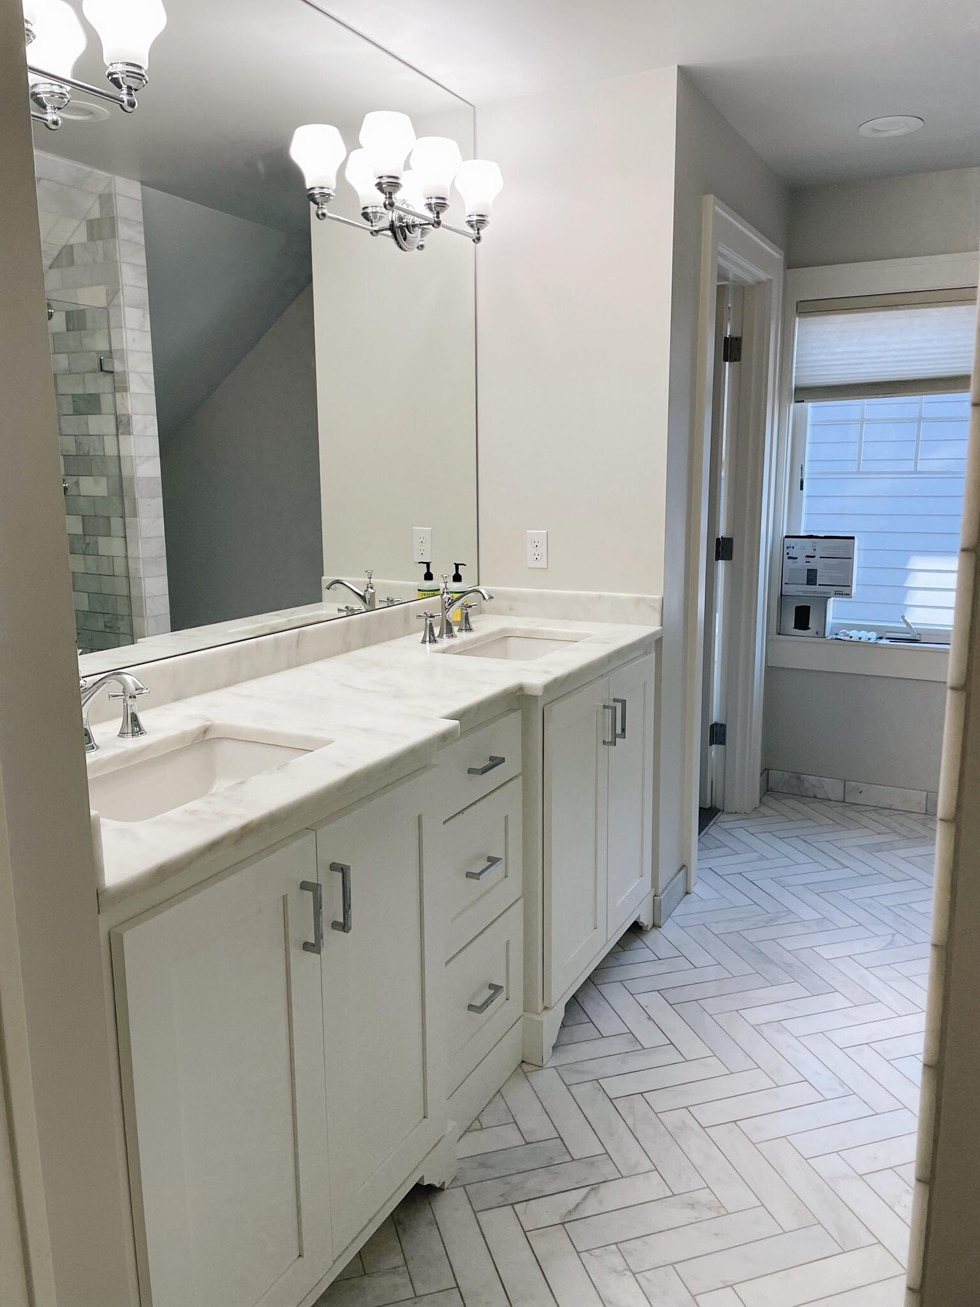
The primary bathroom is a dream! The herringbone floors, the double vanity…I’m obsessed. We’ve considered a couple minor updates to make it more our own, like new lights and hardware, but we are enjoying it as it is for now.
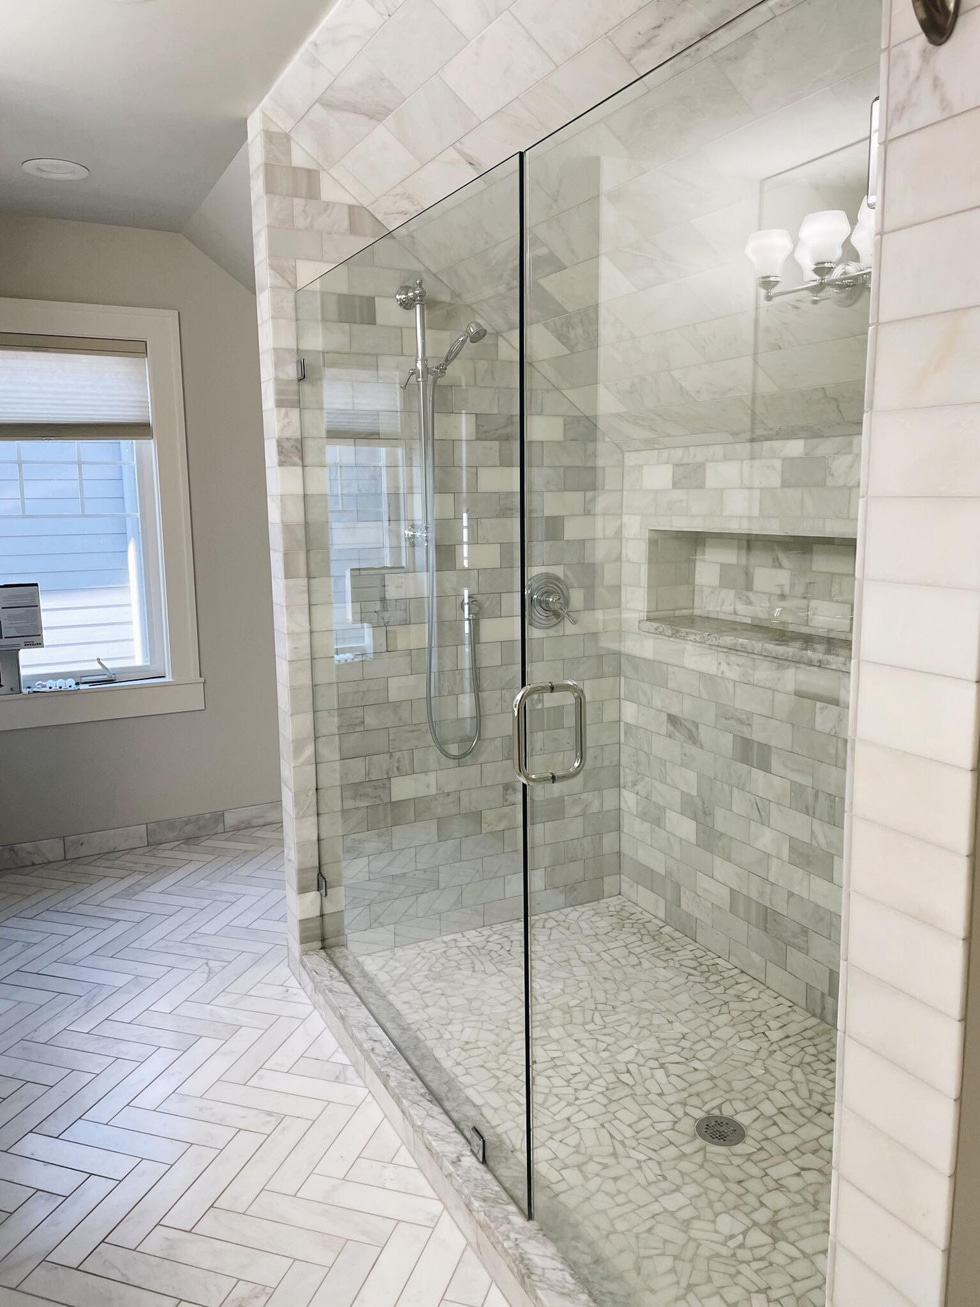
Also, this shower. Can you even?! There’s a little nook back there behind the shower that is kind of wasted space that I’m considering putting a vanity table to do my makeup. And to the left there is a HUGE walk in closet. Like, almost more space that we need kind of huge (not that I’m complaining!).
Thanks for coming along on this tour! We’ve already settled in a bit and started decorating so I’m sure I will be back soon with updates. If you follow along on my Instagram, I’ll be sharing some of our progress in real time!
f you’re just catching up, here are a few recent posts related to Kylee’s Move:
Kylee’s Cape Cod Style House (first few photos!)
Via https://civilco.construction/kylees-empty-house-tour-the-inspired-room/
One of the few still celebrated legacies that the British Empire left behind during the era of colonisation in Asia was this hodgepodge of an interior design style. Done right, the British colonial interior design style evokes a breezy laid-back atmosphere, perfect for endless lounging and relaxation. We take a look at how to recreate this design in this style guide.
Background

Image courtesy of Galen Crout
The British occupation of the “tropics” between the 17th and 19th century represents a dark part of history, where exploitation and subjugation are couched under empire discourses of salvation and civilisation. But it was also within this period that we saw a series of cultural amalgamation, evident in the homes of these European immigrants who decided to settle down in their colonies.
These colonisers brought with them the elegance and formality of British interior design—the height of which was the Victorian style then—and adapted them to the heat and climate of the tropical environments while drawing details from local traditions and culture. What resulted is a blend of tropical living with the classic and formal styles of British interiors.
Whitewashed walls

Design: Sync Interior
The heat, sun and humidity of the tropics were often considered “hazardous” for European constitutions, so keeping the interiors feeling cool was often the first order of business.

Design: Sync Interior
Walls were therefore whitewashed or painted in soft cream tones or light sand to create the illusion of a light and airy space. These light-coloured walls also provided the perfect backdrop for the rich dark wood furniture and the eclectic décor.
Airy interiors

Design: DistinctIdentity
Wooden shutters were often employed to keep out heat as well as to protect the interiors from the frequent storms in the colonies. Nowadays, there isn’t a real need for shutters, but you can still get them for a more authentic colonial look.

Design: Space Sense Studio
Most shutters come with fixed louvres, but for more flexibility, opt for those with adjustable ones that let you determine the amount of heat and light you want to come in. For a more modern window furnishing option, black-and-white bamboo blinds are a good alternative.

Design: M3 Studio
To further combat the heat and keep the air inside moving, ceiling fans became an important part of British colonial homes. Get the look with ceiling fans that come with dark woodgrain designs or ones with an antique metal finish.

Design: M3 Studio
Textures through natural materials

Design: Haus Atelier
Because of the relatively simple palette, textures were used to create more visual interest in a British colonial interior. Consider then how to create a more layered home.
One way to do so is to include the use of natural materials. For flooring, opt for dark timber wood or a lookalike for easier maintenance. Sturdy and formal furniture in dark teak or mahogany (hardwoods did better in humid climates) were also a common feature in colonial homes. Look out for ones with ornate carvings or interesting motifs—animals, plants, fruits—that would add another layer of texture to your space.

Design: Insight.Out
Contrasting against this formal look were the more casual rattan and cane furniture and furnishings. These were lightweight—which made travel easier for the British adventurer—while also helping to beat the heat. Rattan daybeds are a common sight, conjuring images of lounging on a particularly hot afternoon.

Design: Ehka Studio
When inviting textiles and fabrics, go with light and breathable fabrics like linens and cottons. These contribute to the easy breezy feel of a British colonial style home.

Design: Authors Interior & Styling
Globetrotting tendencies

Design: The Association
The British elites likened themselves to a well-travelled sort, which meant their homes were often decorated with items that they have sought in their travels. When sourcing for furnishings, hit up second-hand furniture stores for unique and vintage pieces to add to your home. Consider also exotic, travel-inspired decor like Chinese ginger jars, blue and white porcelain, magnifying glass, old maps, travel trunks and telescopes.

Design: ICIA
Campaign furniture was also a must-have in the homes of the elites. Originally produced for British officers on military campaigns who stayed in tents and couldn’t live without their modern comforts, they were later a staple in wealthier homes in the tropics. These were furniture that were multifunctional, collapsible and highly portable, to make travelling around with them easier.
Some common campaign furniture to include in your own British colonial style home are steamer chairs, folding drink trays, and military chest or chest of drawers that usually come with removable feet and can be split into smaller parts.

Tropical flair

Design: The Local Inn.terior
There was a certain obsession amongst the Victorian British for plant collecting. Plants in the tropics were seen as exotic, which saw many colonisers incorporating tropical plants in their own homes. Large ferns, palm plants make a big impact while orchids and hibiscus offer a softer, more feminine touch to your British colonial style home.

Design: Collate
For the brown fingers, consider tropical prints with floral and fauna motifs as an alternative. Use them in wallpaper, soft furnishings and furniture upholstery. More unusual places to incorporate a tropical flair include drawer or cabinet handles, table décor or lighting.

Design: Collate

Design: Authors Interior & Styling
Stockist: 10 places to shop for British colonial style furnishings
The Past Perfect Collection
For: Campaign furniture and other antiques

315 Outram Road
#11-05 Tan Boon Liat Building
Singapore 169074
https://pastperfect.sg/
Island Living
For: Rattan furniture and gorgeous beds

5 Eunos Ave 8A
#02-05
Singapore 409459
https://www.islandliving.sg/
The GoDown
For: Conversation starters and interesting vintage items

100D Pasir Panjang Road
#02-08 The Meissa
Singapore 118520
https://www.thegodownstore.com/
Bungalow 55
For: British colonial style accessories and smaller furniture pieces

8D Dempsey Road
#03-04
Singapore 249672
https://www.thebungalow55.com/
Originals
For: Intricately carved furniture

1 Bukit Batok Street 22
Level 5
Singapore 659592
https://www.originals.com.sg/
Second Charm
For: Customised wood and rattan furniture

21 Kallang Ave
#05-165
Singapore 339412
https://www.secondcharmhome.com/
Junkie’s Corner
For: Vintage trinkets and furniture

2 Turf Club Road
Singapore 287988
https://www.junkiescorner.com/
Singapore Trading Post
For: Romantic old Singapore furniture and décor

315 Outram Road
#07-01 Tan Boon Liat Building
Singapore 169074
https://singaporetradingpost.com/
Blafink
For: Customised upholstery pieces in tropical prints

19 Tai Seng Ave
#02-01
Singapore 534054
https://www.blafink.com/
Journey East
For: Solid wood (teak and mahogany) pieces as well as vintage furniture

315 Outram Road
#03-02 Tan Boon Liat Building
Singapore 169074
https://journeyeast.com/
Via https://civilco.construction/a-guide-to-the-british-colonial-interior-design-style/
Sitting at the edge of Bedok Reservoir, Tampines GreenJade and Tampines GreenQuartz are nestled amidst a cluster of other BTOs. We compare these two Tampines BTOs that were launched in Aug 2021, and see what units to go for if you decide to buy a flat at one of the two developments.
At a glance
| Tampines GreenJade | Tampines GreenQuartz | |
|---|---|---|
| Location | Bounded by Tampines Street 96 and Bedok Reservoir Road | Bounded by Bedok Reservoir Road and Tampines Street 95 and 96 |
| No. of units | 546 | 1,613 |
| Unit types | 4- and 5-room flats | 2-room Flexi, 3-, 4-, and 5-room flats |
| No. of blocks | 6 | 13 |
| No. of floors | 15 to 17 storeys | 10 to 17 storeys |
| Surrounding amenities | •Nearest amenities: Supermarket, eating house and retail shops at upcoming BTO Tampines GreenGem (estimated completion in 2nd quarter of 2023) as well as the commercial development located along Tampines St 94 next to GreenQuartz •Hawker Centres: Tampines Round Market and Food Centre (~17-min walk), Kaki Bukit 511 Market and Food Centre (~18-min walk) •Park: Bedok Reservoir •MRT stations: Tampines West and Bedok Reservoir MRT stations (~8-min walk), both on the Downtown Line. |
|
| Schools within 1km (estimated) | Junyuan Primary School, Red Swastika School, St Anthony’s Canossian Primary School, St Hilda’s Primary School, Yu Neng Primary School | |
| Estimated completion date | 3rd quarter of 2025 | 2nd quarter of 2026 |
| Which Tampines BTO to choose? | •Shorter waiting time, as fewer units in the development •Overall better lift to unit ratio •All 5-room units have balcony |
•More playgrounds and fitness corners as well as a small park on site •More surrounding amenities •Some of the 4-room and 5-room units come with balcony |
The sites
Tampines GreenJade and Tampines Quartz joins several other BTOs in the area. With a large part of the area still under construction, there aren’t a lot of existing amenities nearby.

Site for Tampines GreenJade.

Site for Tampines GreenQuartz.
The nearest amenities will be located at upcoming BTO Tampines GreenGem, which is located adjacent to Tampines GreenJade and opposite the site of Tampines GreenQuartz. The amenities include a supermarket, an eating house and other retail options. There is also a future commercial/residential entity next to GreenQuartz. For hawker centres and wet markets, you’ll have to walk further out to reach them.

The nearest amenities surrounding Tampines GreenJade and Tampines GreenQuartz.
Source: URA’s Master Plan
If you like the outdoors, this is a great place to be. We spotted a lot of cyclists during our site visit. It stands to reason as the area has quite a number of cycling paths (cycling network in Tampines is set to triple to 21 km by 2022) and is well connected by park connectors and with Bedok Reservoir nearby.
In terms of public transportation, there isn’t a huge difference in distance between Bedok Reservoir or Tampines West MRT stations, both of which are on the Downtown Line. GreenJade residents might prefer Bedok Reservoir while homeowners over at GreenQuartz are likely to go with Tampines West. However, if you are thinking of heading down to Tampines Interchange to connect with the East-West line or to visit the bigger shopping malls surrounding the Tampines train station, Tampines West is just one stop away.

What units to choose for Tampines GreenJade?

Unlikely to get afternoon sun: Avoid choosing stacks that may be getting the afternoon sun from either the northwest or southwest directions. Stacks 106, 112, 126, 128, 130, 142, 154 and 160 are the best choices if you want to avoid the afternoon sun. However, these stacks are likely to get the morning sun coming from the East.
Privacy: The rubbish chutes and lifts are located in very close proximity to some of the units in Tampines GreenJade. You’ll want avoid those stacks if you don’t like neighbours looking into your flats while throwing out the trash or waiting for the lifts. For privacy, these are the best stacks to go with: Stacks 106, 108, 118, 120, 130, 132, 142, 144, 154, 156, 166 and 168.
Less noisy: Choose stacks away from the main road (Bedok Reservoir Road) to avoid traffic noise. And don’t pick stacks near areas where there is a high concentration of human activity if you want a quieter stack. Stacks to avoid include those close to the pavilion, drop-off points, playgrounds, fitness corners, car park, childcare centre, bus stops and adjacent school Temasek Polytechnic. Choose these stacks for peace and quiet instead: 104, 114, 116, 124, 136, 150 and 164.
Note: All the 5-room units at Tampines GreenJade come with a balcony.
What units to choose for Tampines GreenQuartz?
Balcony:
Some of the 4-room and 5-room units at Tampines GreenQuartz come with balcony. Balconies add an extra 3 sqm to the size of your flat. These are the stacks with balconies:

967A: 305
967C: 337, 341
967D: 357, 361
969D: 429, 433
970B: 461, 475
972B: 513
972D: 521
Unlikely to get afternoon sun:
The afternoon sun comes in two directions in Singapore. From March to September, it comes from the northwest direction. From September to March, it comes from the southwest direction. These are the stacks that are likely to have the least afternoon sun:

967A: 309, 311, 313, 315
967B: 325, 327
969A: 377, 379
969B: 381
969C: 403, 405
969D: 419
970A: 437, 439, 457, 459
970B: 475, 477
972B: 493, 495, 497, 499, 501, 503, 515
972C: 521, 523
Privacy:
If privacy is important to you, go with a corner unit that is away from the lifts and rubbish chutes:

967A: 303, 305, 315
967B: 323*, 329
967C: 339*, 341*
967D: 359*, 361*
969A: 367, 369, 375, 377
969B: 385*, 389, 391
969C: 399, 409*, 413, 417*
969D: 423*, 427, 429
970A: 439, 441*, 457
970B: 463, 467, 471*, 473
972A: 483*, 485, 491
972B: 505, 513
972C: 519*, 525*
*Depending on the design of the BTO, your neighbours may be able to see into your service yard from the common corridors. Check the 3D model of Tampines GreenQuartz to be sure.
Peace and quiet:
Looking at all the four roads surrounding the site, Bedok Reservoir Road looks to be the biggest and busiest. However, all the other three roads also lead into future commercial entities, so we believe they will get relatively busy as well. Tampines St 96 and Tampines St 95 also have bus stops along the roads, and this will undoubtedly contribute to traffic noise. If traffic noise is a concern for you, you’ll want to avoid stacks facing any road in this BTO.

Along Bedok Reservoir Road.
For zones with high human activity, you are looking at areas like the pavilions, playgrounds, park on-site, the childcare centre, car park, fitness corners and drop-off points.
As such, these are the best stacks if you want some peace and quiet:

967B: 319, 321, 323, 325
969B: 391
969C: 403, 405
970A: 441, 459
970B: 471, 473
972B: 505, 507
Still got questions on either Tampines GreenJade or Tampines GreenQuartz? Let us know in the comments!
Via https://civilco.construction/tampines-greenjade-and-tampines-greenquartz/
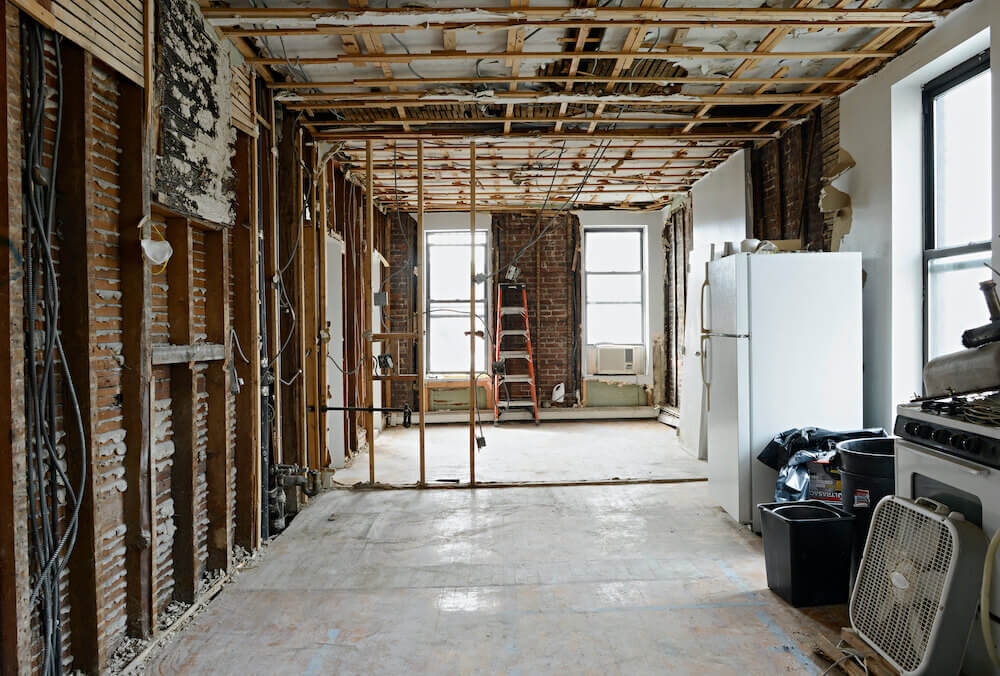
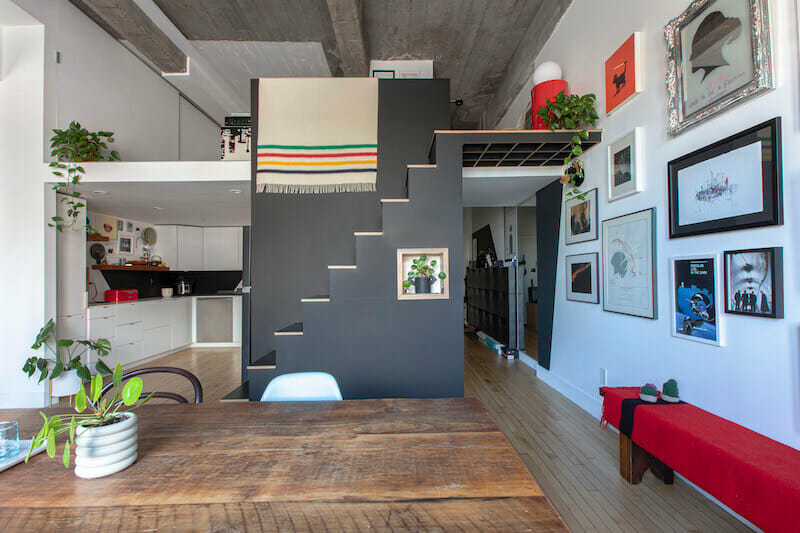
When embarking on his Brooklyn loft remodel, this interior designer stayed flexible

“After†photos by Miao Jiaxin for Sweeten
- Homeowners: Alex and Sue posted their loft remodel on Sweeten
- Where: Cobble Hill, Brooklyn, New York
- Primary renovation: A full-unit Brooklyn loft remodel aiming to add storage and functionality while preserving the apartment’s “80s loft†aesthetic
- Sweeten general contractor
- Sweeten’s role: Sweeten matches renovating homeowners with vetted general contractors, offering advice, support, and up to $50,000 in renovation financial protection—for free.
Written in partnership with Sweeten homeowner Alex
Elevating the best aspects of home
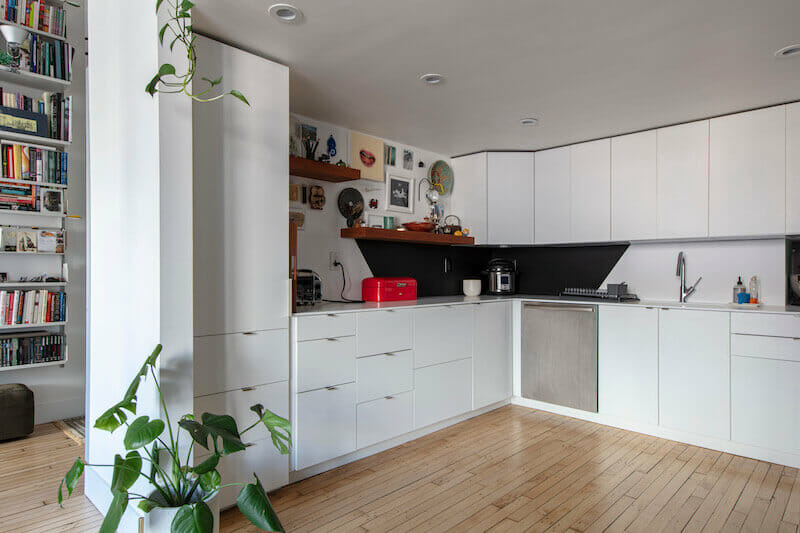
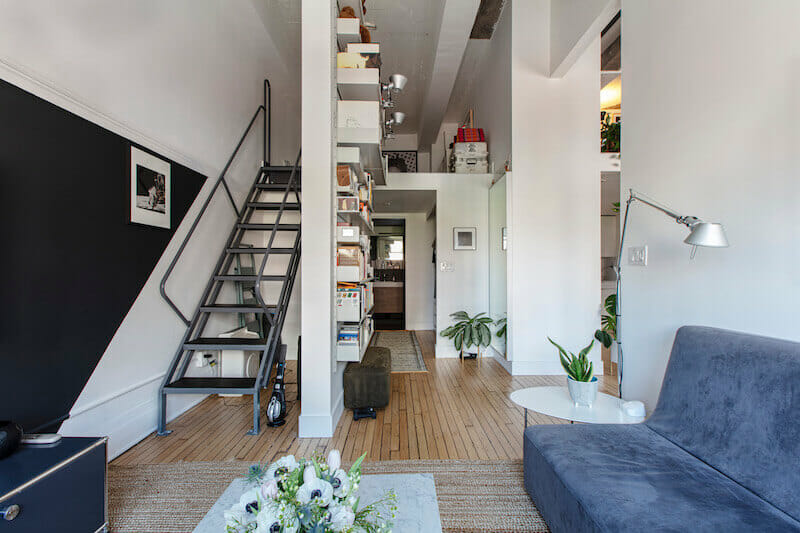
We have been living in this apartment in Cobble Hill, Brooklyn, since 2015. It was the first place we lived together, and it felt like a real 1980s loft, which Sue and I liked a lot. The previous owner was crafty—he’d installed his own kitchen cabinets, and the spirit of the place was very DIY. Sue works in Fin-tech and I am in interior design. We didn’t do much work when we first moved in, thinking it made sense to let the apartment evolve.
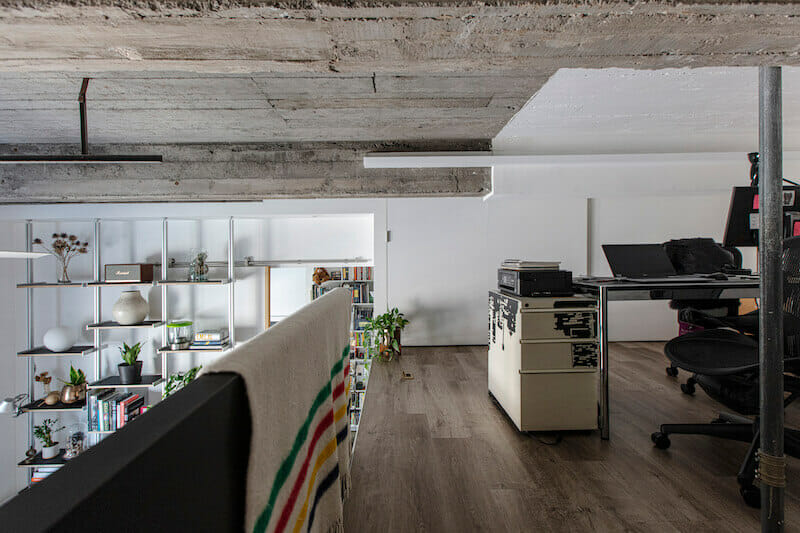
The apartment comprises approximately 900 square feet. It had many vantage points, which our cat, who recently passed, really enjoyed. The neighborhood seems to have a lot of building conversions—a church here, a school there, made into residential apartments. Our building belongs to the latter group, and was converted more than 30 years ago. Visitors are often amazed at how wide the hallways are. That sort of space is not something you often encounter in NYC.
Honing in on the shared lifestyle
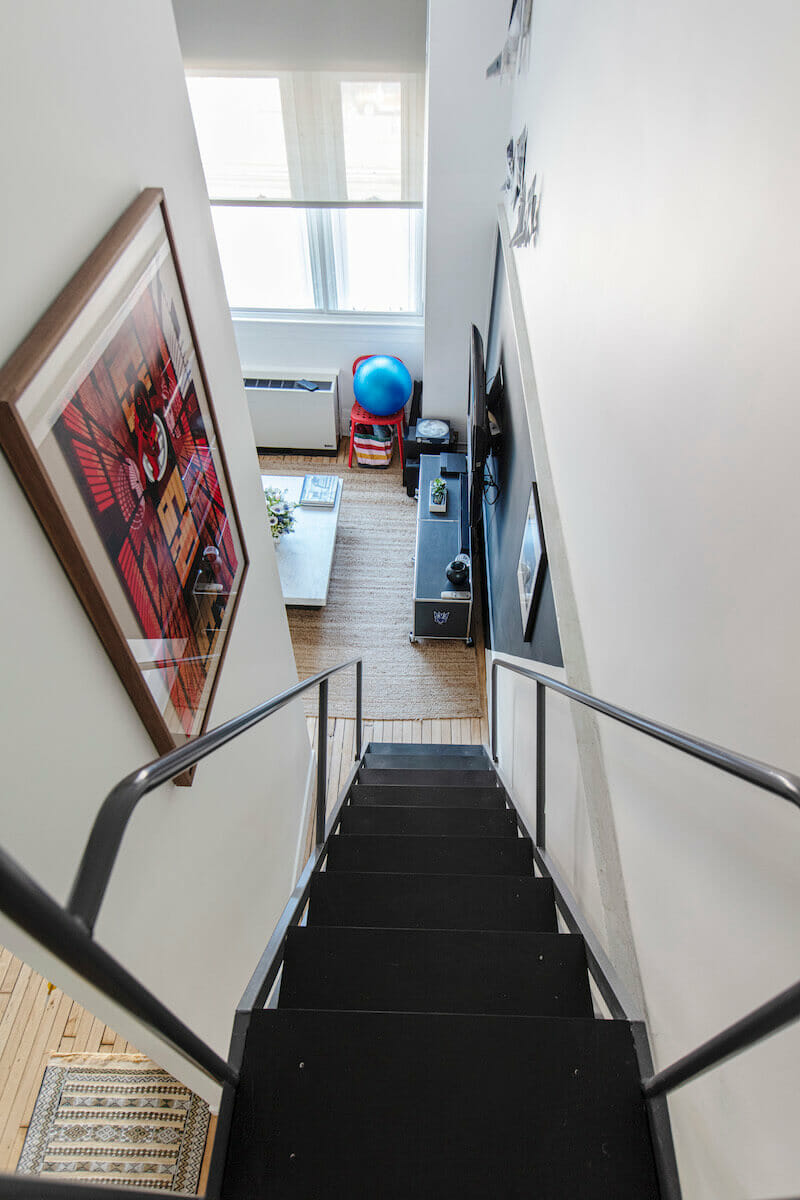
Looking to build on the apartment’s openness, we made a few changes early on. One was removing a spiral staircase and replacing it with an industrial-use stair; it remains in the same location in the current iteration. Another was taking out an idiosyncratic shelving system that the previous owner had installed. We are both utilitarian, and that aspect of our personalities influences our aesthetic.
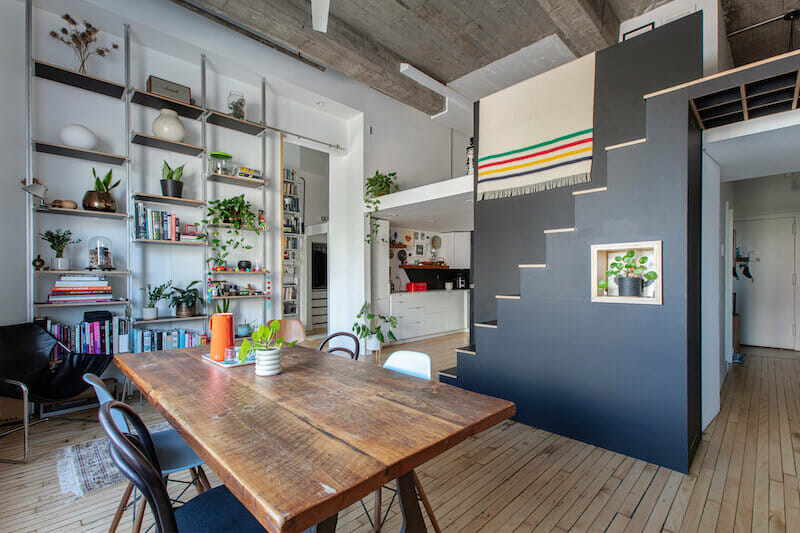
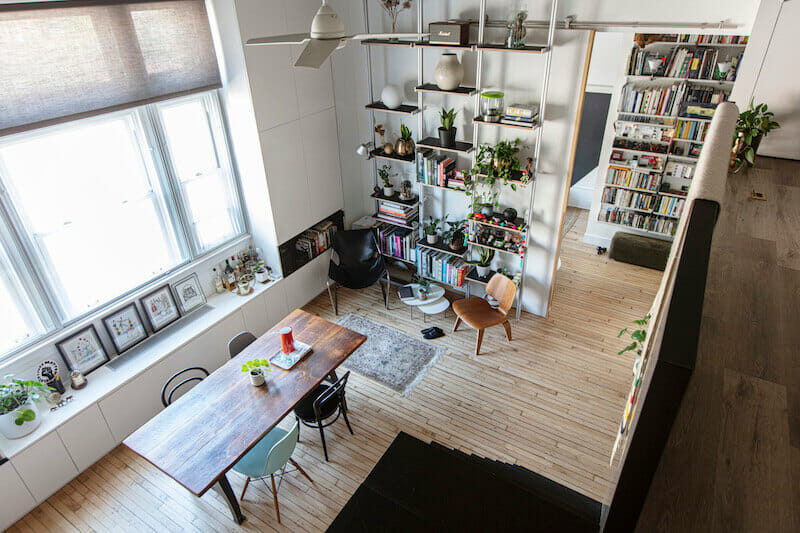
We also like this word that the Dutch have, Gezellig, which translates to something like coziness. It’s not a style, per se, but achieving it was a driving force for our renovation. We didn’t want an overly designed space, but rather one that felt considered.
Practical launch pad to renovate
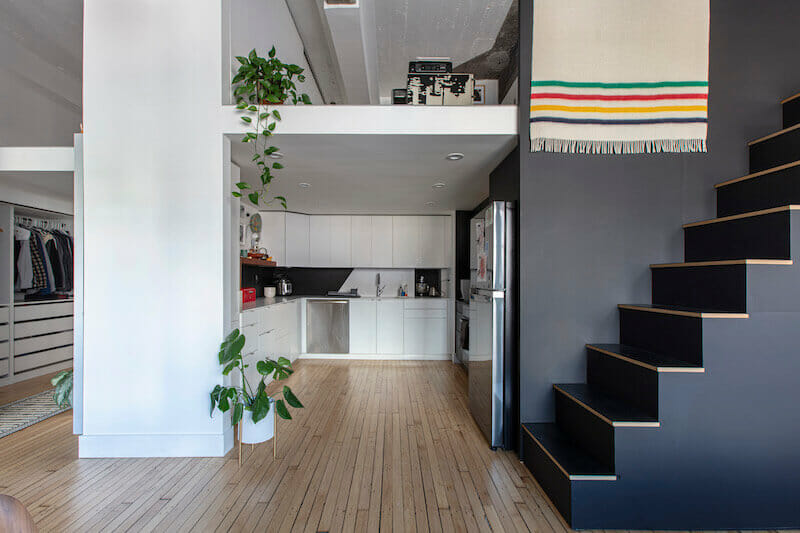
We planned our renovation to coincide with the water boiler warranty expiration. Each unit has its own boiler, and you always hear about these things failing shortly after their warranty goes. We figured we would try to avoid becoming a statistic. The apartment was also in desperate need of an electrical panel upgrade. We wanted to add an in-unit washer and dryer and a shower to our powder room. In addition, the apartment lacked, and desperately needed, built-in storage.
We posted our project, and Sweeten was a great help in providing a list of relevant contractors. Since I work in this field, I did not utilize other services the company provides. I wanted to complete the renovation within an allotted time frame, and keep within a firm budget. Our Sweeten contractors were great to work with; we had a few conversations before the renovation, and they were very accommodating.
In the end, we were able to salvage the work and it turned out nicely. It felt serendipitous.
Design tricks-of-the-trade
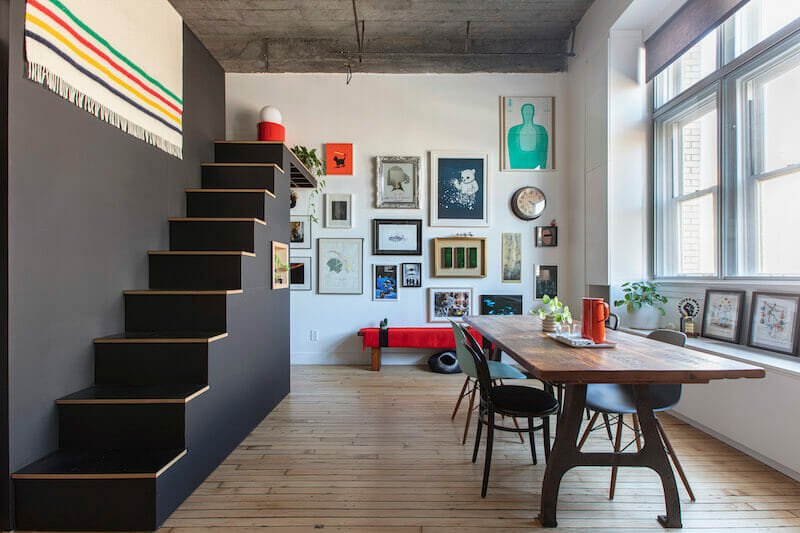
It is always exciting to see a project on paper come to life, but it is especially interesting when you have an experimental client—in this case, ha!, ourselves. Our contractor convinced me that we should open up the entry foyer, which I wasn’t sure of. But in the end I think sacrificing the extra storage was worth it to expand the passageway. We also separated the passthrough between the dining and living space with an oversized barn door, which disappears when retracted.
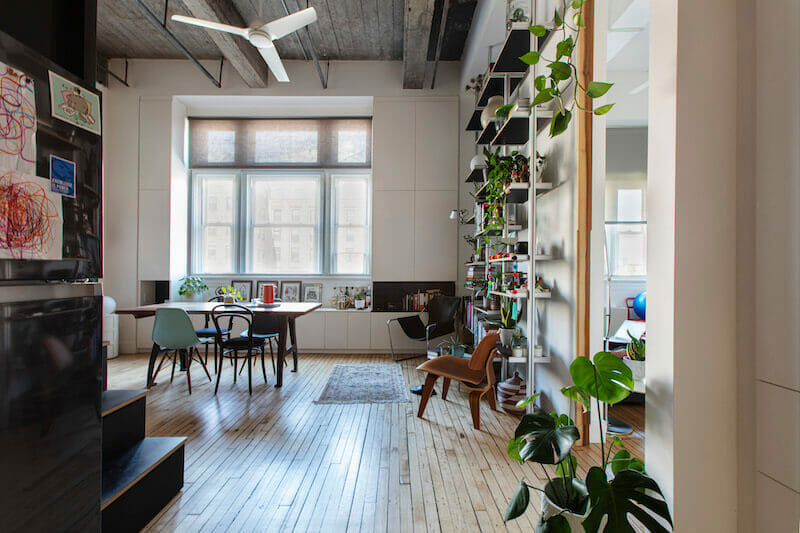
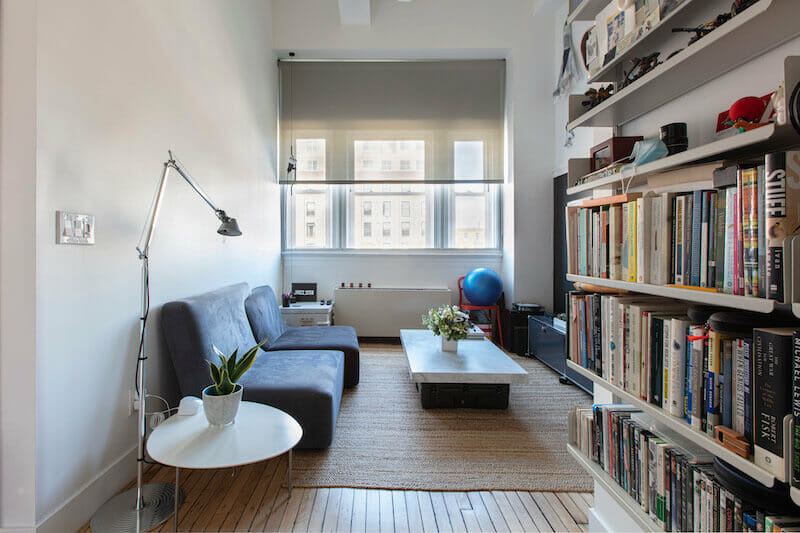
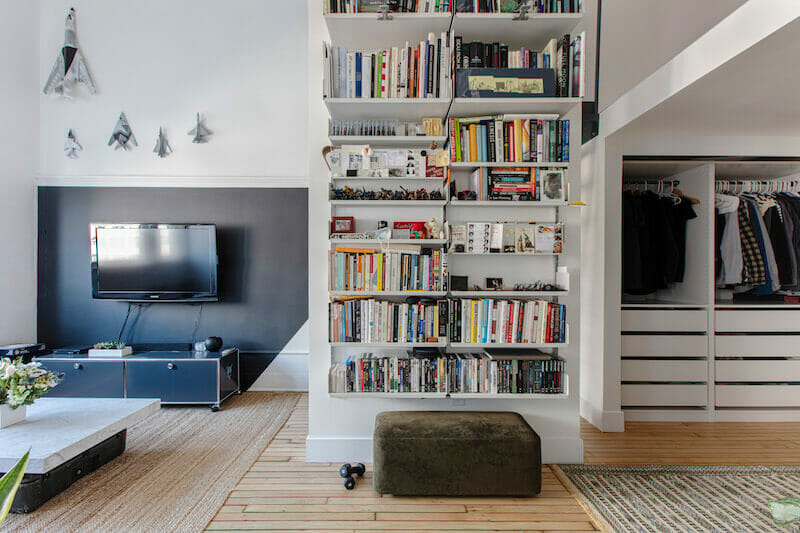
We employed other tricks as well. Take the painting and color scheme, for example. We applied a World War I ship-camouflage technique known as Dazzle—which was a way of masking the volume and shape of military ships using geometric patterns—to try to make walls and objects more or less vanish into the space. We used black behind the TV to have it blend into the space. It is also a nod to the blackboard that would have hung on the wall in this former classroom.
We stayed with a pretty strict material palette just because it is easier to manage and is also a fun challenge to stretch the limit of the material. For example, the black countertop and black backsplash is actually a paper-based product that is extremely durable. I also used it as treads for the stairs.
Being flexible during the process
No matter how simple you aim to keep it, in any construction project, there will be challenges to overcome. We moved out of the apartment during the renovation, but I went to the job site every other day to make sure we were moving forward. During one visit, I noticed that the contracting team had framed one of the walls in the wrong location. Instead of losing time having the contractor demolish the framing and restart, however, I decided to redesign that portion of the space. I did it overnight. In the end, we were able to salvage the work and it turned out nicely. It felt serendipitous.
Paying attention to and working within the process always helps, and given my work, I am familiar with the arc a job follows. Our favorite part of the renovation was the end.
Working from home for the past year, we were able to enjoy the apartment’s ample flow of sunlight throughout the day. It is great to have a space that works so well and feels not just in sync with the building we live in, but with our entire lifestyle.
Thanks for sharing your Brooklyn loft remodel with us, Sue and Alex!
Materials Guide
LIVING AREA RESOURCES: Paint in Simply White and Black Forest Green: Benjamin Moore. Industrial staircase: Grainger.
KITCHEN RESOURCES: Paint in Simply White: Benjamin Moore. Kitchen cabinets and hardware: Ikea. Countertops and backsplash (white material from Krion; black material from Richlite; Elkay sink and AXOR faucet: Porcelanosa. Refrigerator: Samsung. Dishwasher and stove: Bosch.
BATHROOM RESOURCES: Porcelain wall & floor tile; Vanity and sink: Porcelanosa. Shower fixtures and hardware: Hansgrohe. Toilet: American Standard.
—
Sweeten handpicks the best general contractors to match each project’s location, budget, scope, and style. Follow the blog, Sweeten Stories, for renovation ideas and inspiration and when you’re ready to renovate, start your renovation with Sweeten.
Via https://civilco.construction/a-cozy-brooklyn-loft-remodel-in-a-converted-school/
ABOUT US
CIVILCO Construction and Interior is a quality-oriented construction company that was founded in 2004 by its Chief Executive, Engineer Mujeeb Ur Rehman. He continues the construction family tradition while maintaining its outstanding reputation with an uncompromising commitment to quality and safety. With a strong reputation as an industry leader in Design-Build construction, CIVILCO construction provides excellence in a full spectrum of pre-construction, program management, construction, interior management, inspection, and quality control services.
CIVILCO continues to deliver the best value in building services by placing experienced construction professionals on every project undertaken.
The company is driven to deliver the projects ‘On-Time without Cost Overrun’ using world-class project management techniques and has uncompromising standards of quality, safety, and sustainability.
CIVILCO has a team of experienced Engineers and Architects; emphasizing in the establishment a “ hands-on “ shares authorship with each client results in building and interior architecture incorporating unique planning and management solutions. The firm practice is characterized by a combined emphasis on construction and excellence and a high standard of client services.
https://civilco.construction/
Archives
No Archives
 RSS Feed
